From thrift store salad bowls to cute modern bird feeders, these babies can be done in a weekend. Probably in a day if you start earlier than me. Read on!
Total Cost: $12-$15 for both.
Gather your supplies:
- 2 Wooden Thrift Shop Salad bowls ($1 each!)
- Sanding Sponge or Sanding pad & electric sander
- Craft Paints (.88 cents each, score)
- Primer (optional)
- Spray Paint (optional)
- Paint Brushes
- Wood Stain (I used Dark Walnut)
- Clearcoat (I'm using minwax polycrylic, love it)
- Drill with bits for making holes
- Plastic Mesh Sheet (found mine in the embroidery and needlework aisle)
- Short Screws and Washers
- 2 - S hooks
- 1 Turn Buckle
- 2 Long eye hooks
- Twine
- Chain
- 1 long eye hook (for mounting)
- 1 long regular hook (for mounting)
- Level, or a really good eye.
First things first, assess the damage to your bowls, and start sanding. These things sanded pretty fast, but wear a mask - who knows what's in that 70's varnish! Sand whichever way you want. I started with the sponge but was just too lazy, so I broke out the Makita.
Once your bowls are nice and smooth, it's time to make a drain hole. Since we don't have a lid on these, we don't want bird seed soup every time it rains. Drill!
Now it's time to think ahead. How shall you hang these? I did both methods. Eye hooks on the shallow tray (because it was REALLY hard to drill through):
Ok pause - in the above right picture, I'm demonstrating how much EASIER it is to screw in those tiny things if you put something inside the eye hook to turn. Hello leverage!
Option two for hanging is to drill 3-4 holes evenly around the rim of the bowl, for twine to later pass through.
Done. Break out your paints! Here's what I learned, I totally should have primed. See how one took the paint fantastically and the other fought me on it? Yea.. oops. If only I had primed...
I taped the side of the shallow one because I want a nice strip of stained wood with the yellow.
Rather than putting 300 coats of craft paint on, I admitted defeat and then did a quick prime & paint job. Bada bing.
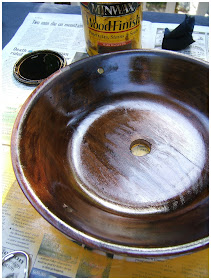
Hello beautiful! They are yellow now, and should be dry pretty quickly. Flip 'em and stain 'em.
Let that dry. You should probably wait 24 hours or something, but I didn't. Meh. Sometimes ya gotta take a chance. Then I clear-coated with my poly:
And it's time to fix up the drain. I didn't want a roof on my feeder, so the only choice here was to come up with a clever drain. I couldn't think of a mesh to keep the seed in but let water out, other than window screen (and where was I to get such a small piece!?). But this plastic mesh is doin the job! I found it in the aisle for embroidery and needlework at the craft shop, I think it's the stuff people used to make those little cube puppets...and they'd put Hershey's kisses in the mouth...covered in yarn....no? Man what were those called?! Anyway....
Cut a large circle of your mesh, take a SHORT screw and a washer and secure it. Tie on your twine (I did extra long folded in half, for durability) and start leveling.
Reposition your strings until it's level and then tie the 3 strands together. Now we can hang 'em up!
Allow me to explain. The spot I wanted my feeders had NOTHING to hang from, since it was between trees, so I had to come up with this solution.
On the left side, I have an eye hook, an S hook and the chain.
On the right side I have a hook, our turnbuckle, an S hook and the chain.
The turnbuckle is amazing, when you make it as long as possible, you can connect the ends of two things (the chain and the hook) then when you turn the middle piece, it self tightens. Isn't that special?
Be sure to clamp your S hooks shut and disguise your turnbuckle if it bugs you. It bugged me so I shot it with black spray paint. Ha!
Grab some seed and fill your feeders up. You are DONE!
Aw... cute...
Here's a stand back shot. Yellow screen on the front door, yellow bird feeders... it's all coming together!
This is part 1 of ?? for the Front Deck Redo... but I have a lot of ideas in the works. Check out my Pinterest board for a sneak peak. It's right off our kitchen, so it's super handy for entertaining, and it gets great sun all day.
What did you think, is it time to start feeding the flying creatures of your neighborhood? I've loved seeing all the different birds that have come by so far, and the squirrel - while totally making a mess and scaring the birds - is adorable.
Have fun!
-Jesse


Too cute Jess!! I love these on your deck and such a great idea-as always!! And matching the screen, that is so special. ;) Love, Mom/Diane
ReplyDeleteYour blog is really helps for my search and amazingly it was on my searching criteria.Thanks for sharing this informative blog with us.
ReplyDeletecheese board & salad bowl