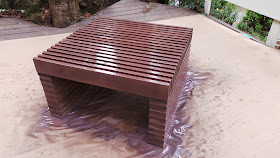
Here's how mine came out:

Learn from me: I stained my table after I built it, and while it wasn't impossible, I'm pretty sure it would have been easier to stain before making the cuts, then come back and do patchwork where needed. Up to you!
Materials:
- Twelve 1" x 4" x 10' boards - these will be our slats (I had some extra, but I always over buy just in case)
- Two 1" x 3" x 8' boards - these will be the spacers in-between the slats on the top piece.
- Miter saw
- Air Compressor (for the nail gun & paint gun)
- Nail-gun & 2" brads, as well as a few 1" brads. Just buy the assortment box, you never know. (Here's what I used)
- Wood Glue
- Fine Steel Wool
- Vinegar (about 3 cups)
- Water based Minwax Stain - I used "Coffee"
- Minwax Polycrylic Clear Coat
- Gravity Feed Paint Sprayer (if you'll be spray painting)
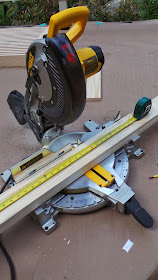
Well the first thing you need to do, is make a ton of cuts. Take your 1x3, and measure how wide it is. These things are never actually the width they say, and we need squares. Mine was about 2.75", so now I knew I needed 2.75" squares. 38 of them! 19 spacers on each side.
Chop chop... I found stacking 2 at a time cut the job in half. Literally. Lots of puns & jokes in that one.
Once that is done, break out your 1x4's - it's time to cut the slats for the top piece. Decide how wide you want this beast, I wanted somewhere in the ball park of 30x30. Plus, with a 10' board, this works out to exactly 4 pieces per board.
I lined them up just to see how many I would need to make my top piece. Don't worry, we'll do the legs later. Let's just focus on the top piece. I ended up with 20 slats for the top, at 30" a slat.
I didn't sand much, or at all, until the end because this is a reclaimed timber slat table. Though my wood isn't reclaimed, the reclaimed look we are mimicking gives us this freedom!
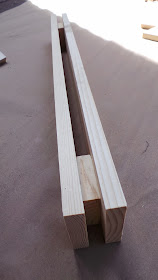
Ready for some nailing? So the idea here, is to sandwich our small square spacers inbetween our slats. To get the look that they are floating, we need to put the squares nestled in from the edges. To save time, I made this little device out of scrap wood:
That shows it upside down, so I could put the nails in. It's easy to make. Just decide how far in you want the squares, and make an "L" that fits. These photos explain a little better:
With the L in place on a slat, you can simply put a square next to the L, and set them both flush against a spare board (standing behind). No measuring needed after the first one!
Throw a few nails in (I used shorter nails for this first step so they didn't poke out the other side)
Repeat for both sides of the slat:
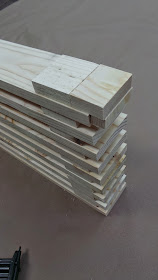
And now you have the foundation for what you need to do 1 million times more. Add a slat, line it up, nail. Add the squares, line 'em up. Nail. I used the 2" brads so they would shoot through multiple layers of wood, adding to the strength.
I turned the slat up on it's side to use my flat surface as a tool to line the bottoms up, and nailed from the side:
Then laid it back down, used another slat behind and my "L", dabble of wood glue, and pop the next square in:
Over and over. Use a spare board to check that everyone is flush on all sides now & then before nailing. It's a slow, yet easy process.
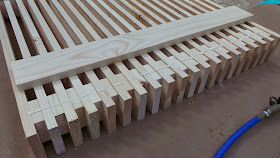
And were done! Check out your beautiful table top:
I stopped at 20 slats total for the tabletop, which came amazingly close to a perfect 30" square.
Break out the saw again, it's leg time. We'll be adding the legs opposite the direction of the slats on the top. In other words, on the right side of the square in the photo above. Measure that side on your tabletop, and cut all your leg slats to match that size. Mine was 29.75" wide, yours will likely be slightly different, so just measure.
Our coffee table is a height of 16.5" including the top. Which worked out to be 9 slats for the legs on each side, and 8 spacers on each corner.
- Totals: 18 slats, 32 squares as spacers.
For THESE spacers however, I used the 1x4 pieces of wood to make squares. I made them a tiny bit smaller so they wouldn't line up perfectly. I thought it would look neat. That is up to you, make 32 of those puppies.
We are going to build the legs directly onto the table top. Turn your tabletop UPSIDE DOWN. See how my spacers in the tabletop are all showing now? That's because it's the bottom. We will build on that part. And just like you did for the top, start gluing, layering, and nailing:
Glue:
Nails & Spacers:
When you nail, it helps to rotate the nails position. I got into the habit of nailing 3 nails in a triangle on one layer, then on the next layer another triangle of nails but in the opposite position. Make sense? Be sure to keep checking that everyone is flush as you build the legs, using a straight spare piece of wood, or a triangle if you have one.
Done:
As I mentioned before, I chose to do my sanding after, and there wasn't much to do. I just took the clean edge off a few areas here and there, to help it look old & used:
You can see there how my spacers are 1/8" smaller, to give some definition to each layer.
Now I started with a technique I've used many many times to age wood. You need strong coffee or tea, and steel wool soaked in vinegar. If you want the full directions for that, see this post.
First I loaded up my gravity feed spray gun with the strong coffee/tea, and sprayed every nook on it. This is where I mean it may have been easier to do this before hand.
Once that has dried, you can spray it with the vinegar. (The vinegar has to "cook" with fine steel wool in it for 24 hours before this reaction will work. See this post for details, very easy)
You can already see it turning grey.
Now every wood is different, and sometimes the tea & vinegar job is enough to satisfy. This particular wood didn't age as dark as I had hoped, so I took some water based stain I had on had to it. This is Minwax's "Coffee" stain. Note, I used waterbased because I was scared oil based in my gun would ruin it, and that thing wasn't cheap.
I sprayed the entire thing, soaked it!
Then after 20 minutes or so, came back and rubbed in some of the puddles. Like I said, no perfection here, we're going for a reclaimed look.
After a day in the sun, I loaded up the gun one last time - this time with the Minwax Polycrylic Clear coat, and gave it a matte seal. Before we take a look at the finished product, here's a reminder of our inspiration:
And now, the staged photos:
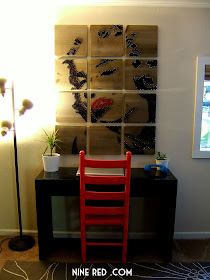
Where is this in our house you ask? Here's what it looked like before we set up the stage:
And that's what it looks like again. I'm sitting in front of Marilyn, right now..
What do you think, going to tackle the table? It's a lot easier than it looks, once you get into a rhythm it's just a matter of repetition. Put on some good music, you can do this in about a weekend. As you know I totally didn't win the contest, but I was extremely honored and flattered to get to participate at all!
Thanks for all your love & encouragement everyone, if you make a slat table, show me! Either email it to me or post it on my facebook page.
Have fun!
-Jesse












This turned out SO FABULOUS! I just want to gobble it up! You totally should have won. :)
ReplyDeleteThank you! That's sweet, there was a lot of competition in there!
Deletewow! it looks wonderful! i love it!
ReplyDeleteThank you! I'm considering getting a glass top made for it, so nothing falls through. Otherwise I love it :D
DeleteJesse,
ReplyDeleteThis is so amazing! I recently started redecorating my living room and I'm looking for ideas to make smalls tables for all my plants, this looks like something I could do! Great work! (I think you should get a glass top too!)
These directions seem so easy to follow - thank you!!!
ReplyDeleteYay! You can do it Jessica :D
Deleteastonishing collection !!!
ReplyDeleteFlush door Manufacturer in India, Block Board Manufacturer in India, Veneer Manufacturer in India