This is such an easy project, the part that takes the longest is waiting for it to dry. Here's the finished product, in the practically finished room!
So you want to make it? Simple! You'll need:
- 100% Cotton Pillow Case (or fabric to make a pillowcase)
- Bleach
- Gloves
- A bowl
- Vinegar
- String & rubber bands
- Spray bottle
First up, do what you'd normally do in tie dye. Start spiraling the fabric, or folding and twisting, experiment! I chose a spot, pinched it, spiraled then clumped it all together. Be sure to tie it up really tight with rubber bands or string, the goal is to prevent the bleach from getting to ALL the areas. Since it was just me on this project, clothespins helped hold the fabric while I tied:
In the above shot I was doing an "accordion fold" - then folded that in half upon itself and wrapped in crazy string. The result is the center "striped" tie dye you see on the finished pillow.
Place ONLY THE AREAS you want bleached in a bowl. Now, put some bleach & water in an empty spray bottle. I did half & half, and it didn't take much either. Maybe 1/2 cup of each.Start spraying your tied areas with the bleach water solution. P.S. - don't wear your favorite outfit for this.....
This was about 5 minutes in, changes colors really fast!
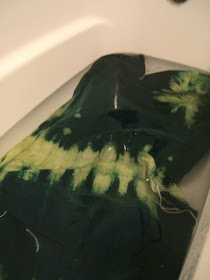
Now stay close, because this happens pretty quick. I'd say mine was done in about 15 minutes. Once your happy with the color you're getting, fill your bathtub with enough warm water to submerge it. Throw the whole thing underwater and start untying. This is the fun part!
Reveal your beautiful patterns and rinse rinse RINSE! Get all that bleach out. BE SURE to get as much of the bleach out!
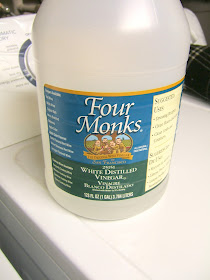
As a last precaution, ring the thing out and pop it in the wash with a cup or two of vinegar. I read somewhere that the vinegar "stops" the bleaching action. Whether it's true? I don't know - but it's cheap and harmless enough to just give it a shot, right? Plus Vinegar is the cure-all of home remedies, this stuff works miracles.
***WARNING*** A reader pointed out that vinegar & bleach should NEVER be mixed, as it creates a toxic reaction. To clarify, I rinsed out my bleachy fabric in the tub full of water, so be sure the bleach is out. Skip the vinegar if you do not feel comfortable with this step, BE SAFE. Read this article for more details. (Thanks Patricia!)Our washer is the type without a central column, some new eco-whatever feature, weird huh? Times they are a changin..
That's it. You're done, and it was a lot of fun! Here's mine, fresh out of the dryer & full of pillow... mmm!
Oh that's the bedspread I got by the way! I stayed with simple, it's more light blue in person, but I felt like keeping the bedspread simple & getting wild with the fabrics on the pillows instead. Plus it was 85% off at Bed Bath, so I got a killer deal, which bumped it to the front of the line... you know how it goes.
It's so easy to get carried away with this project because it's so fun, but I was trying really really hard to actually keep some of the original teal - I've had reverse tie-dye projects in the past where I practically bleached the entire thing. Oops!
Think you'll give this one a shot? Share your photos with me so I can share with the rest - do you have any tie-dye-tying tips for us? (Say THAT ten times fast...) I'd love to hear & share 'em!
Do something you love today ~
***UDATE: Guest room? Check.. See the full tour here***
-Jesse
Up Next: My round up of 9 DIY planter projects from around the 'net...
More Guest Room Posts & Projects:


Came out great, Jess!!! Yes, you are right about the vinegar. Back in my hippie days, ;) we did that too. Love, Mom
ReplyDeleteBleach and vinegar should NEVER be used together. It causes a toxic chemical reaction! http://chemistry.about.com/od/toxicchemicals/a/Mixing-Bleach-And-Vinegar.htm
ReplyDeleteOh wow, interesting article! I should clarify - I used the vinegar in the washing machine, after I had thoroughly rinsed the bleach out of the fabric in a bathtub full of warm water. I'll edit to make a note & warning - thank you!
Delete