


I love it when things work out as planned! Remember when I talked about the Kitchen Table Makeover ideas? Well, I stuck to it. This idea has been floating around in my brain for a month or so now, but it was intimidating! Fear not, after this test run - I feel confident I could repeat this anytime. Set aside a weekend or so though,
not so much because it's that time consuming, but because once you start to see your progress you are really going to want to finish. We ended up staying up pretty late to finish, I just get so excited! So, you think you want to do this to your table? Smart move my friend... smart move.
Here's what you'll need:
- A table (duh!)
- Paint: A quart of whatever leg color, and small bottles of many colors for the top.
- Plaster of Paris
- Tape (edge lock, baby)
- A protractor (never thought you'd need it, did ya?)
- Straight edge, like a yardstick or similar.
- Paint Brushes
- Electric Sander + fine sanding pads
- Minwax Polycrylic Clear Coat
- Update: This Triangle Ruler would have saved me SO MUCH TIME if I knew about it...


For the sake of not losing half the readers here to a long drawn out geometry flashback (painful), I'll explain this step in depth at the end of the post. So scroll down if you are curious. For the rest of you, I'll explain with my measurements which should be a shortcut. If you have a math magician in your home, just bribe them into doing this part. That's probably easiest.
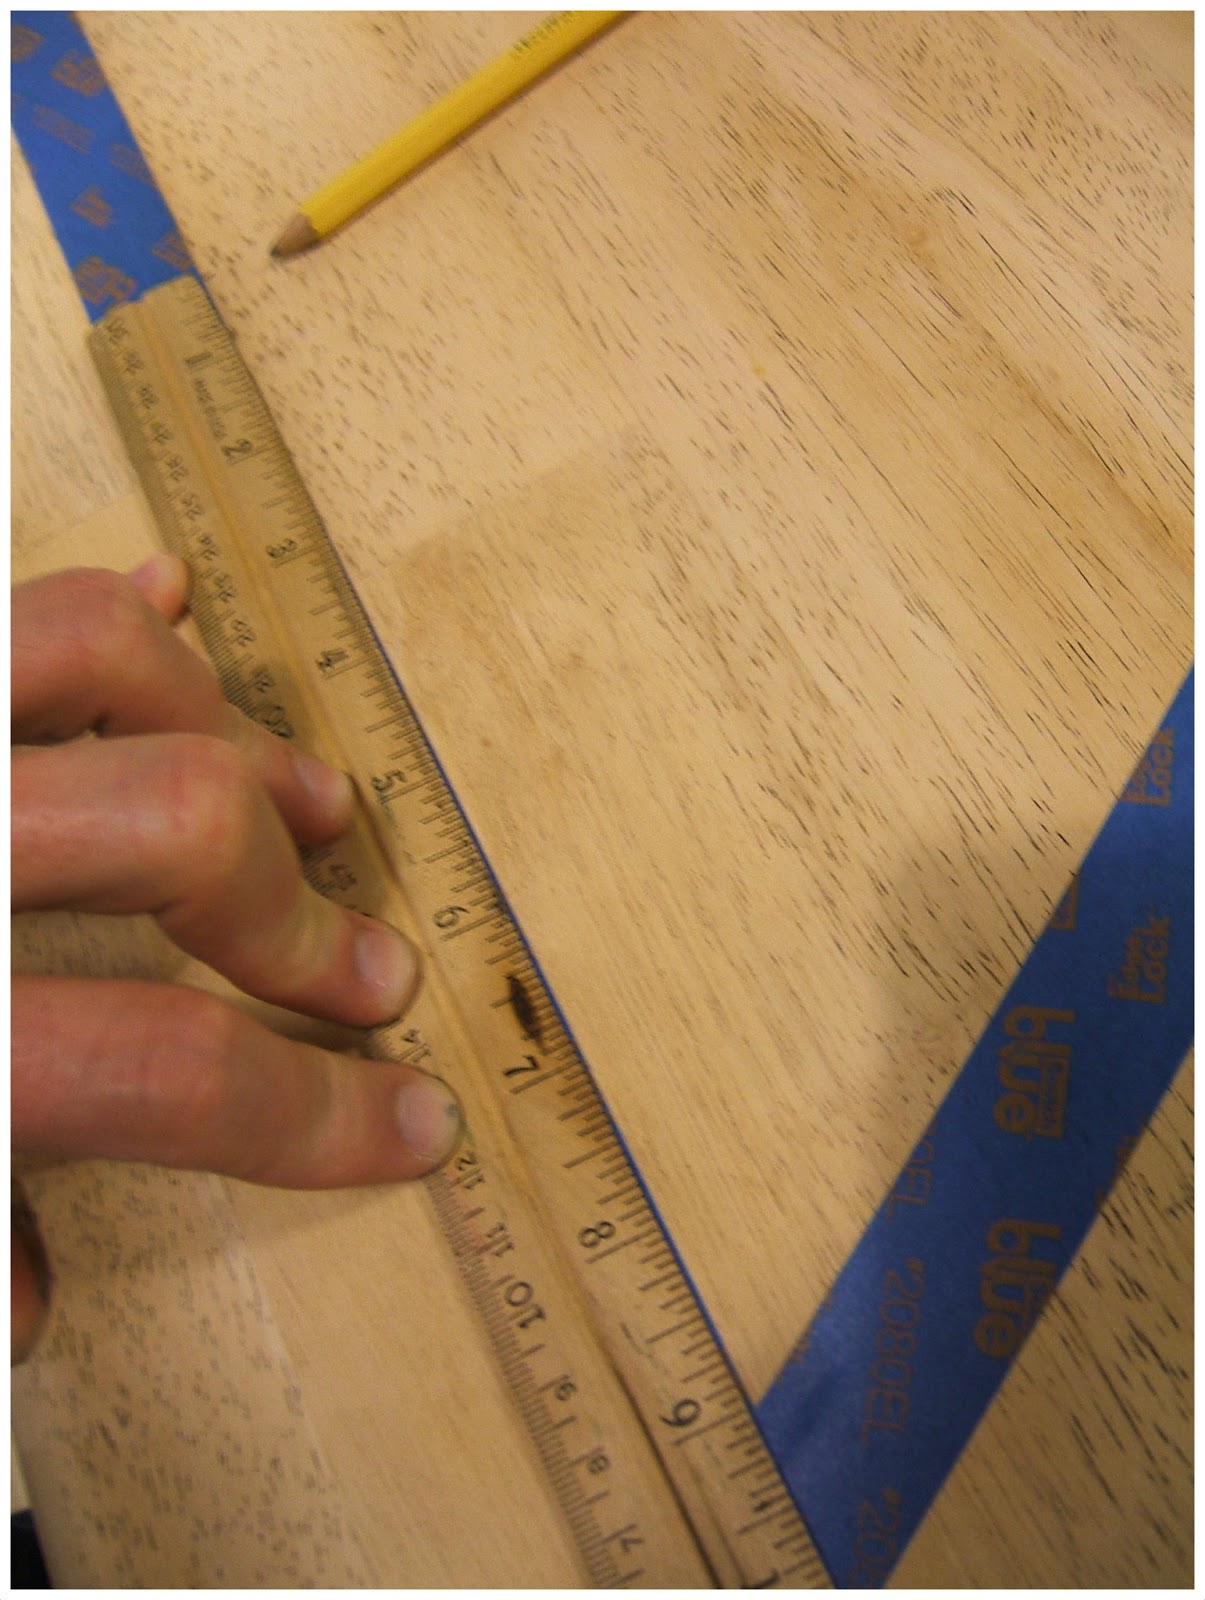
In a nutshell, or, on a tabletop rather (ha!), I put my stripes along the table every 7.75 inches apart. Then, somewhere in the middle, I marked a random spot on the tape edge. Then, I took my protractor (told you we'd need it) and lined it up with that spot, then followed along and made a mark at 120 degrees, or 60 degrees from the other side. Remember all angles in a triangle (interior) add up to 180, so for these equal triangles I needed angles of 60.
Use your straight edge or yardstick to connect the two points you just made, and place a piece of tape along that edge along the whole table. Now you have a line in which to measure off of. I measured every 9 inches, from that angled line we just made, drew a point, then I used my straight edge to connect all those points with tape. Over and over.
So point, measure 9 inches, tape. Measure 9 inches from outside of new line, mark a point, tape.

Now I took a break there from these dizzying angles to paint the legs. I used the tried & true chalk paint recipe, because I didn't want to sand the legs. Hey, i'm lazy, who cares? It worked.


Back to our tabletop, ready for the fun part? Hopefully you've picked a million beautiful colors, here's what we had lined up:

Sidestory: I used to think I was so smart, and that I would save money and get more paint per dolla by buying paint samples at home depot. Well, I have no idea where I came up with that, because samples are almost $4. Sure, you get more paint, but these bottles at the craft store were 99 cents! So again, learn from me, huh? This would have cost me around $32 but instead, cost me $8.

Anyway, this step seems pretty self explanatory. Put good music on, crack a beer, and get your hands dirty. We rubbed some paint in the triangles with our hands, then wiped the excess off with paper towels. Some of them needed a second coat, you be the judge with your own table.


What do you think? Do you love it or is this too busy for ya? Either way, it's sure to catch an eye & start a convo. OK - now as promised, I'll explain a little in depth the geometry magic tricks I had to pull out of the back of my brain for this, so for the rest of you - class dismissed! Haha, thanks for reading & have a great one!
In the next post: Questions & Answers for repainting a dresser.
Let's keep in touch: Facebook, Pinterest, Instagram, Twitter & of course, Email.
Alright fellow Mathletes (ok, im not a mathlete, but I wish I was) here's what I had to do. Knowing I needed equilateral triangles for this table, I just let the tape and the angles be the guide on this. I taped the first stripes off so that they were equidistant, mainly following the planks of wood in the table. I taped a stripe every 4 planks, which happened to be 7.75 inches apart. Then, taking my protractor, measured out from a point to the 60 degree point, which would serve as one interior angle. Like I said in the tutorial. Taped, repeated. You're probably reading this because you are wondering where (and how) I came up with measuring 9 inches apart. After taping the first angled stripe, I measured the side of the tape that would serve as one of the interior sides of the triangle. Essentially, keeping in mind that all sides must be equal, and I needed a specific measurement so that I didn't have to use that protractor over the entire table. ugh! Lucky for me, it was a perfect 9 inches. So measuring from that tape, I just did 9,9,9,9, connect the dots with tape, you know the drill. Once those angles were in, I split the diamonds one time, in the opposite direction, creating the 2 perfect triangles, and remeasured my interior side length. It was something like 8 and 5/8" I believe, with this number, I could then do the measure & mark routine from before, creating perfect triangles.
That, my friends, could probably be way better explained by someone who knew what they were doing, mathwise, but it made sense in my brain and that's all I needed. I bet the triangles would have been fine just eyeballing it, haha. Thanks for hanging with me to the end here, gold star for you!
-Jesse
This table came out as awesome as usual! :) It looks like this one will be featured in your next book of projects. Love both of them!!!
ReplyDeleteWow! Awesome! The triangle designs look beautiful! I'm proud to say you did a great job. Congratulations!
ReplyDeleteThat is absolutely awesome!
ReplyDeletethank you!! I'm loving that pattern every day I see it :D
DeleteThat's awesome! I'm tired of my boring table! angelgenius27(at)yahoo(dot)com
ReplyDeleteThis is just happy! It vaguely reminds me of a STICKS product. Love it!
ReplyDeleteLove!!!!!
ReplyDeleteI've been in love with this idea since I saw it and I finally got a chance to try it out for myself! My blog post is here: http://maddasahatterr.tumblr.com/post/52504716190
ReplyDeleteThanks so much for this tutorial!
Oh WOW! You're table came out SO cute!!! I love the squares, great job! I'm so flattered that you like my table enough for it to stick in your head :D :D The wood showing through looks grea on your table, and man, what a killer table! Octagons all the way... I love it. I'm gonna FB it :D
DeleteAbsolutely love this! I was trying to find some cute color ideas to paint my handed down farm style table for my apartment and I found this on pinterest and immediately fell in love! Definitely going to do it this week with my roommate!
ReplyDeleteYay! Send me photos!!! 9redinfo@gmail.com I LOVED this project, I'm so flattered you like it. It really is the focal point of our kitchen now, and ties all the colors together.
DeleteThanks for commenting! I love hearing from readers :D
It took me longer than expected to finish due to crazy work schedules but here it is finally!! http://mnschubring.blogspot.com/2013/07/diy-table-thanks-to-nine-red.html
DeleteAWESOME!!! That came out GREAT! Thanks for sharing Morgan!
DeleteDo you do the legs with poly or just the top?
ReplyDeleteYou can poly them if you'd like to protect them, I didn't because eventually I'll be distressing them. Hope that helps!
DeleteI'm always fascinated every time I see simple things become extraordinary. This kitchen table really deserves the attention. It was just a simple wooden table before, and now look at that! It's very pretty and colorful. It will surely increase someone's appetite.
ReplyDeleteGabrielle Jeromy @ Majestic Exteriors LLC
This looks fabulous, and it just gave me the inspiration I needed for a desk top I've been meaning to "pretty up". Thanks for the share :)
ReplyDeleteawesome! I'd love to see how yours comes out! 9redinfo@gmail.com
DeleteI was spending months...well weeks...maybe days....alright HOURS, trying to figure out what to do with my kitchen table top, and this was it! I love your blog, and it's so great to see other men out there crafting.
ReplyDeleteYou can check out my version here ---> http://onewallatatime.blogspot.com/2014/03/diy-geometric-table-makeover.html
Thank you!
Hoppin over there now! Thank you!
DeleteI ♡ this! Thank you for the inspiration!!! Gave me some ideas :-)
ReplyDeleteInspired by your project I painted my boring coffee table almost same. I would love to show a picture but I don't know how to attach it here. Thanks.
ReplyDeleteInspired by your project I painted my boring coffee table almost same. I would love to show a picture but I don't know how to attach it here. Thanks.
ReplyDeleteWhat a beautiful table.I love it!
ReplyDeleteRustic Dining Table And Chairs
Rustic Dining Table And Chairs