Hello again! I'm still around, I hope you haven't forgotten me! Summer has been wild & crazy in all the right ways, but the downside is that I've totally neglected blogtime. Womp! Between vacations, string projects & the Maker's Market (a first for my sister and I!) I've been a busy boy. Warning, this is a long, picture heavy post - I recommend a coffee refill...
Yet - I still found pockets of time here & there to chip away at the long list of ideas for the brick patio. While I admit, I am not ready to lay all these out in tutorial form yet, I figured it would still be fun to play around with the camera so you could see what's been changing, and so you know I didn't fall off the face of the earth.
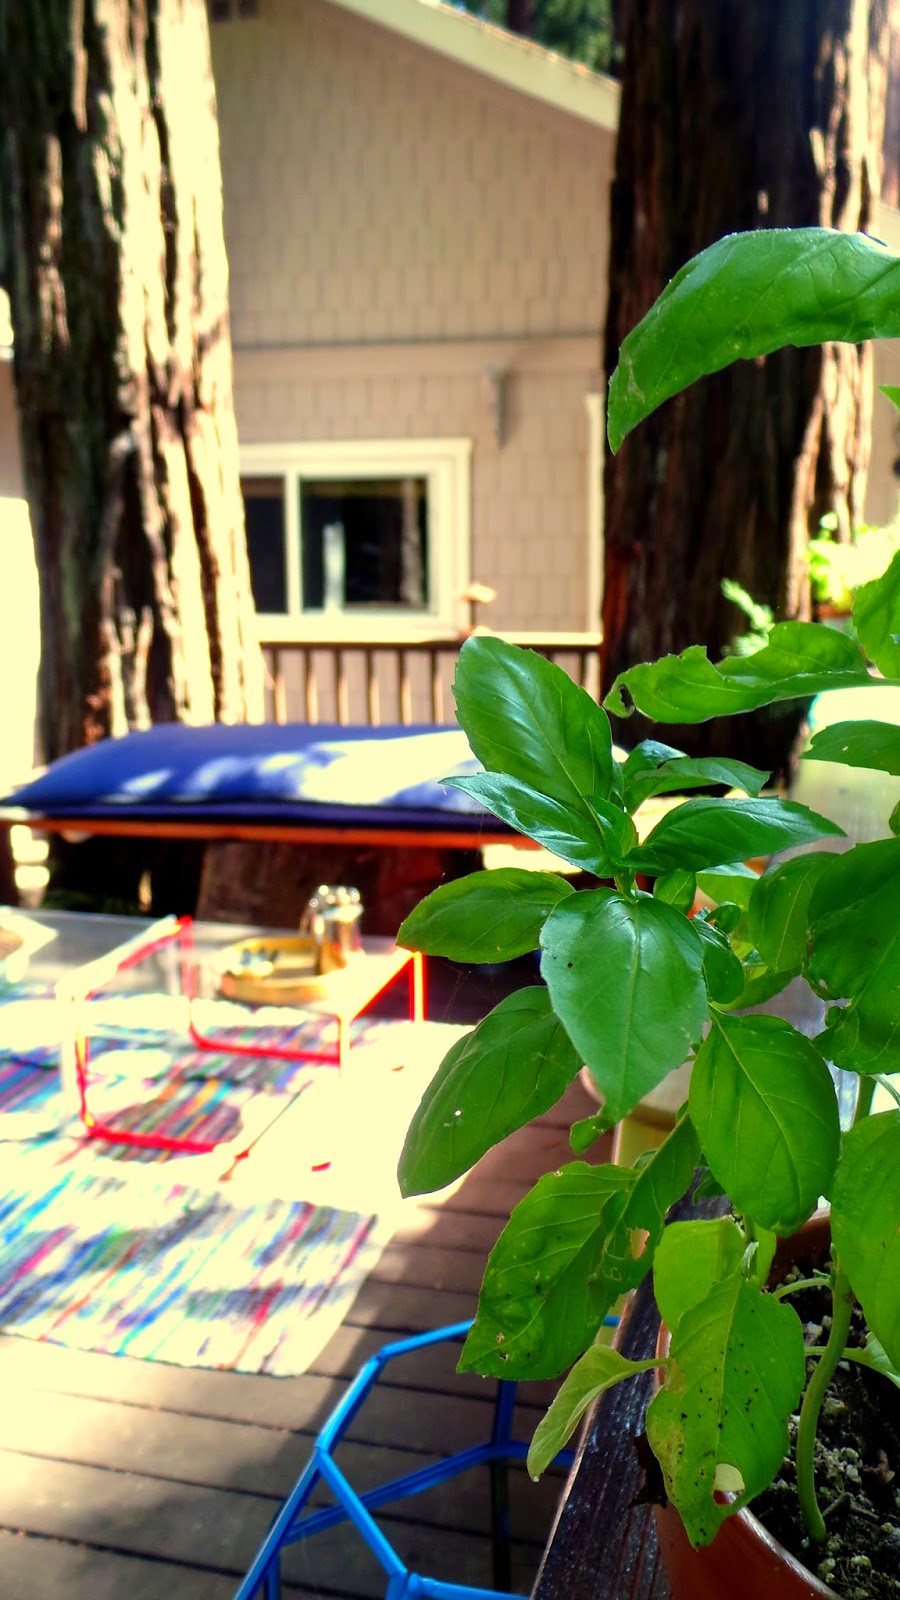
So, here is where we are right about now -
Aaaaw... isn't that lovely. This is one of my favorite times of day out there, it's about 3ish... sun comes blasting through, and with all the bright colors we've been adding this is now by far our cheeriest patio. Hands down. Oh, so you may think at this point "That is NOT brick" and you're right. This area of the brick patio is wood, but the bulk of the rest is brick and I had to call it
something. You'll see the overwhelming brick side in phase 2. Here's another angle:
I'm a total sucker for a good depth of field shot. Mainly what I love about the background being blurry, is it gives you a nice little color swatch of the area, highlighting what's most dominant without focusing on the details of the items. Ok mainly it just looks coool...
This little stool I found at a thrift store for ONE DOLLAR. I swear it's from a childcare set (you know how those lofts & such are always built of over polished plywood? Yea, that was this) Oh lucky us, I found a photo:
I turned it into this:
With all the wild colors going on, I wanted some more white, and I thought this stool was the perfect candidate. I'll post a friendly tutorial soon, but in short I painted the insides of the legs first, sanded off the edges where any paint overlapped, and stained the top & edges in dark walnut. Very... carefully...
Now for the stools! (If you haven't seen the bar area,
click here to go read)
In a complete impulse decision at Home Depot, Ralph and I grabbed a yellow paint card and ordered a sample of 5 different yellows that were in a row.
Sunny & bright!
The fade is pretty subtle, you know I love ombre & I couldn't care less if it's "trending" or not anymore, I think it just. looks. great.
These aren't quite done, we have to adjust the heights & sand, stain & seal the tops. Thinking dark walnut? I should be responsible and give the paint color names, I always feel horrible when I lose these & people write me asking for them. So here goes, from left to right, all paints are BEHR:
- Extreme Yellow
- Smiley Face
- Yellow Jubilee
- Banana Mania
- Vanilla Ice Cream
Up next, a random angle shot that highlights the fun fluorescent pink table we have. I guess I could have cleaned it before taking a photo, but you know how it goes. I'm lazy. These two metal tables were also thrift store finds, around $12 each:
Here's the before, lots of rust that you can't really see here:
I was browsing craigslist for tables when I saw a bamboo & glass coffee table that immediately begged for me to email the owner. I imagined solid white, with a glass top, on top of this crazy rug, but alas, it was sold. But the simple, glass table idea stuck, and now we have these pups.
So pretty! If you're wondering about the rug situation, a large rag rug was beyond $200, so I am taking 6 (or maybe 8 by the time I get to this project) smaller rugs that were $5 each, and stitching them together to make a large rug. $30-$40 vs. $200, I think I will come out ahead.
Close up of pinky, with it's
possible accessories:
It's always so hard for me to be patient and wait to accessorize a space. I start collecting things from the house, thrift stores, wherever & begin immediately. I end up redoing it like 10 times before we're "done" (
let's be serious, nothing is ever done).
Ah... another fun blurry & colorful shot... so happy the deer are completely uninterested in this fern:
Aren't the colors fun?? I love them! Oh, see that giant blue pad on the bench to the left there? Let's talk about that thing.. So first we had built a bench over that crazy stump:
It was a medium pain that we'll touch on someday. Since it is so big though, I imagined a large... couch style seat... almost like a daybed. So I made a cushion from a moving blanket! It sounded cheap, durable, large & easy. Perfect for something that can potentially be ruined by the outdoors.
I folded the blanket in half, and sewed it up like a sleeping bag, leaving the top open:
Then I found this foam online for super cheap, (
find it here!) it's shredded poly, and was about $14 for 13.5 cubic feet! Shipping was around $16 to California, and came in a small cube the size of a milk crate. But expanded to this once I opened it:
Again, in another tutorial I can over-explain how EASY it was to get the filling into my sleeping bag type pillow, and sealed it up to be this:
Winchester immediately approved!
Now I know it looks enormous, and that's because it is - but I was confident (
er..really hopeful!) that it would squish down as time went by. Which, update, it has.
It's the coziest cushion ever. When you sit on it, you can't feel the bench underneath, and it's so big you could sprawl out & nap. The current project for this bench is adding arms, a back, & pillows upon pillows. Upon pillows! Mark my words, I will nap here one day,
soon.
Another project was taking one of these oh-so-common light fixtures & turning it into a planter. You see a lot of people turning these into terrariums, but some of the glass was already broken so I had to improvise...
Plus the glass was tinted & I wasn't into it. I kept the top 8 panels in, since that will be my planter, and had a little fun with spray paint:
I used the TOP as the planter because it is the side with the closed panel, in-case you tackle this yourself. And here we go:
I primed the glass & then painted copper right over it. I used a little tape to keep a clean line for my cyan top section, the middle is plain brass, and the bottom is copper.
I chose a perennial I hoped would survive, and planted away:
It's no terrarium, but it's a perfect little cage. You could probably plant a fun annual vine on here & it would look great climbing the structure.
Oh, here's what it looked like before... I held onto this stupid thing for 3 YEARS... I'm so embarrassed, but happy to finally have given it a life other than the one behind our dryer...
I totally kept that center light fixture by the way, I can't resist a fun light fixture... I couldn't fight my inner hoarder on that one.
So there you have it, I'm still around, still balancing too many projects, and finally feel like I'm seeing the finish line on this back patio. On a dose-of-cute note, we adopted a new kitten from the shelter... his name is Hamilton. See, Winchester moved in a year ago, and he's an indoor maine coon who loves to play, and we felt so bad that he was all alone in here! (No more outdoor kittens, the cars drive too fast here & we lost Reuben that way) The other two cats (you read that right, other TWO) only come inside for about 5 minutes a day - Tyler moved out (he fell in love with the neighbors, and they are all very happy it's adorable) and Charcoal loves the outdoors, so we hang out with her out there. So Winchester, now has Hamilton (anyone from Campbell will know those street names!) and the two absolutely love each other:


Have a wonderful Wednesday! What projects are you working on? Huge thank you to those who wrote me during my hiatus to check in, that was so nice to hear from you! Definitely motivated me to take a breather & hop back on here...feels good..
-Jesse
Post a Comment