That's our old kitchen table, we used to have stools around it at the last house. Of course I appreciated the extra counterspace, but having it 6 inches taller than the counter and hogged up by a microwave? Not so much. I knew, somewhere out there in the universe, there was a kitchen cart - just for us - that would not only be the right height, but would hold that microwave on a shelf below. I scoured the internet, and even started to dream up plans of building one from the ground up (Yea, let's add THAT to the never-ending to do list!). Then one morning it dawned on me - duh! Ikea coffee tables!
I was on my way there anyway. So,I went and grabbed two Lack coffee tables from Ikea, we all know the ones. They are the basic of basic, and completely affordable. You'll need 2 if you are going to this project. That's Rubin making another appearance there, always loves to lend a helping hand paw.
Ready to see the new cart?
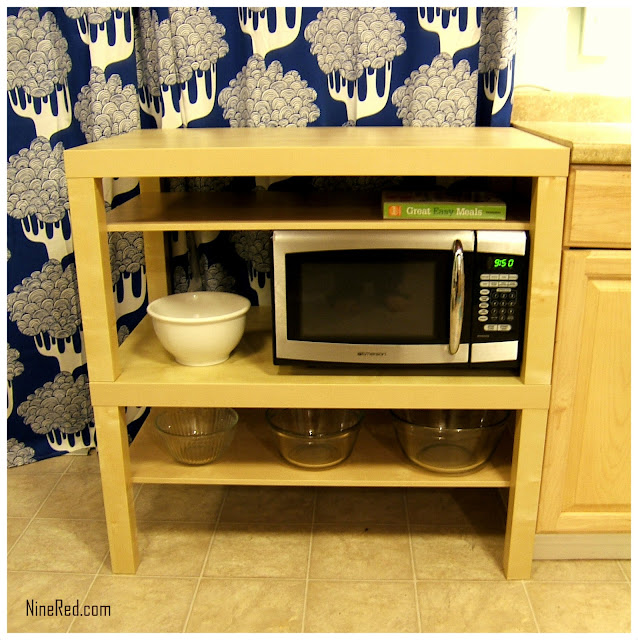
Tah-dah! Instant Kitchen cart. And I mean instant. I'd done this once before in an apartment that was seriously lacking counter-space. Since we couldn't make any permanent additions, we toyed with all kinds of solutions. And wouldn't you know it, 2 of Ikea's Lack tables (that come in many sizes) are exactly the same height as most standard cabinets.
Luckily the color matched pretty well too! Now, the original plan was to buy casters, chop off the legs to compensate for the height change, and add some rollers. Now that we are done though, I think we may just leave it. Also, each table comes with a shelf. It worked out in the bottom table, but we didn't need the other. Instead of wasting it, we installed it just above the microwave. It's now a perfect spot for cookbooks, cutting boards, anything slim!
Remember how I said these are the same height as most cabinets? Well, in the past, they've always lined up perfectly. However, if you look closely on the right, you can see about a 1/4" difference. This, is a blessing in disguise, honestly. The tabletop will hold up to kitchen use for a while, but eventually will start to show some wear and tear. That's what makes this gap great - perfect for adding tile! I plan on doing that before our table shows it's use, and I'll walk y'all through that in a future post.
For now, we have a perfect little cart that was cheap, extremely easy, and gets that space hogging microwave off the counters!
See how easy that was? $40 kitchen cart, you can't find a better price. Not even on Craigslist (unless you're lucky, I looked & looked!)
Got any big weekend projects lined up? I think we may tackle putting in a ceiling curtain system for downstairs, to enclose our huge spiral staircase (think hospital curtains, but less loud and generally creepy). What's moved up to the top of your to-do list?
Have a fun, relaxing, and productive weekend!
-Jesse
***Up Next: The Knobs for the Hutch are in!


Brilliant! What a great hack.
ReplyDeletethanks Dharma! It was super easy..!
DeleteWhat a great idea!!! You aren't "lacking" for your hacking"! I am so corny.
ReplyDeleteHey, this is great! Just what I was looking for. I think I would like to add rollers but wouldn't need to chop off the legs since it would be a stand-alone piece on the opposite side of the room from any counters.
ReplyDeleteQuestion, though: Did you connect the two tables together in any way? I think if we are going to be rolling it out into the middle of the floor to use as an island every once in awhile it's necessary to have them completely stable. Any thoughts?
Another great thing about this hack is that a lot of the kitchen carts out there are one-sided, as in, the back is unfinished or ugly so it doesn't work so well as a 'mobile kitchen island' which is what I'm looking for.
Thanks!
~ Jessica
Not sure if my last comment went through, I'll try again - I used double sided adhesive tape, the strong outdoor stuff, and it works great. But I don't move mine, so I think if you are going to add wheels (which you can also get at IKEA) then you could use L brackets where the tables join, and it should be strong.
DeleteI'm glad I found this post. So easy! My new apt has an eat in kitchen and I need a kitchen cart/island. This will work just fine.
ReplyDeleteAwesome post about best cart casters and wheels and it will be give more information those people who such a need.
ReplyDeletekingpinless casters & shopping cart caster