Ah yes, another tutorial! Special thanks to Ralph, for having the wall space and needing an art project. He had this sheet from when he was younger, and really liked it but... well he wanted a different look. I suggested embroidery hoops, and before I knew it he showed up with 8 in 4 different sizes. This is a super easy way to make some really cool wall art. Be prepared, some of my pictures are a little blurry... but you get the idea!
Ok, step 1: Find yourself some fabric. Anything. Sheets, fabrics, quilting squares, old band shirts, anything. Then get yourself some embroidery hoops. These babies are like, under $2 for the largest, and come in many sizes. Lay your fabric choice out and start throwing your hoops all over it. Look how nifty:
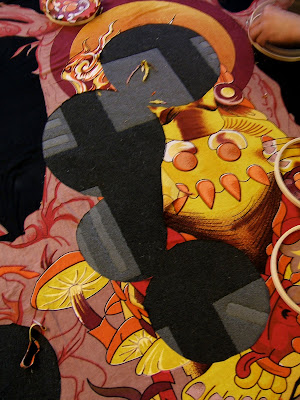
Good job! Now, it's a lot easier to avoid cutting the carpet if you can lift the fabric a bit. But you don't want to lose all that positioning work you did! Enter scene: Sharpie marker. Draw some quick circles around your choice. We did about a half an inch.
Start cutting. I have a special pair of scissors just for fabrics. I wrote fabric ALL over it so no one would ever use them for anything else. Why? Because after 9 years of ownership, those puppies still cut through fabric like butter. Creepy that we are cutting the throat in this picture. Oh well!
That's my rug showing through.
Your circles are cut, fantastic. Loosen your embroidery hook and remove the outer ring. This is a total carpet activity by the by.
Now take the matching circle size and place it over the solid hoop. position it as best as you can.
Take the loose hoop and gently push it over the other hoop. Keep in mind that you'll more than likely hang these hoops by their clasp, so remember which side you want up. Give the clasp a few spins to tighten it up. Don't worry about loose spots in the fabric, we're gonna tighten these soon.
Just how soon? Try now. Look at that! Flip the hoop over, and gently start to tug your fabric through. Don't tug too crazy, you don't want distortion. Just, you know, make it nice looking.
Tighten that clasp all the way. See, he was tightening so incredibly fast that the camera couldn't keep up. So blurry from the fast tightening work. Amazing!
There she is! All done. Wait, no we aren't. We are pretty much done here. Now take your glorious fabric scissors and cut the leftovers off the back. I didn't take a picture because, well I forgot, and no one needs a picture of that anywho.
Repeat your steps and you have an adorable lil family:
Remember old cut throat? Looks great now, huh? I love the crown. When he-she was on a sheet I didn't realize how it looks like a row of little smiling candy corns on his-her head. Now it's all I see!
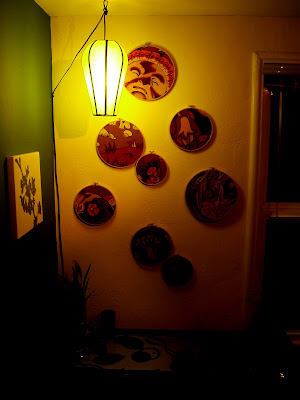
We totally winged it on the hanging, and that's just how I like it. I think they came out great, and I want to do one million more!
A few night time shots:
Great work! I'm sure yours came out great too, I'd love to see 'em. Thanks for reading another one of my long winded tutorials, I'll be back with more - don't you fret. Have a great day!


now that is a great use of embroidery hoops!! i'm going to have to think about what i have laying around that i acn put in one! i'm a sucker for circles!!
ReplyDeleteno, i don't have a feedburner.... i'm not really that skilled at the technology side of my blog yet.... but i will work on one!
yes, i did use a walnut stain to mellow out the brightness of the colors and to give it a little texture.
thanks so much for your comments and for visiting - check back i will work on the feedburner! ;)
http://megschmitt-neveradullday.blogspot.com/