I've mentioned my Paper Crane obsession before, but I just kicked it up a notch. A while back I did a few sneak peaks on the facebook page of my finished paper crane chandelier, and now it's time to share how it's done! I'm really happy with how it came out, and decided to swap the bulbs out for nightlight bulbs, as it makes a great accent light in our living room. The cranes send angular shadows on the wall behind it.
You'll need: - Old Chandelier Frame - anything you can tie strings of cranes to will do.
- Embroidery floss in your color choice and a needle.
- Paints: Primer & Top coat color
- 200 Paper Cranes - I got mine in this etsy shop, but you can also make them if you're amazing.
- Embroidery hoop - just the inner complete circle - (if you need to add hanging room)
- Super Glue
- Long Extension cord or wire by the foot & a plug kit.
- Wire Nuts - 2
- Tape: Masking and Electrical
- Sawhorse (optional, for hanging the light)
- Wall Anchors & Screws (if ceiling mounting)
This project is more time consuming than it is difficult, most the steps are fairly easy. So here's my light fixture, it's one of those 1980's ceiling mounted fixtures:
I've liked these for YEARS but hadn't thought of a use yet. I got this for $4. I love that the glass comes off so easily, and the frame is ready for whatever use you want. Disassemble your light:
I decided to keep the wiring and the ceiling mount, because even though I'm turning this into a plug in light, I thought it would look nice to mock install it on the ceiling, instead of using a hook and chain. The wiring looked very clean, so I didn't need to replace.
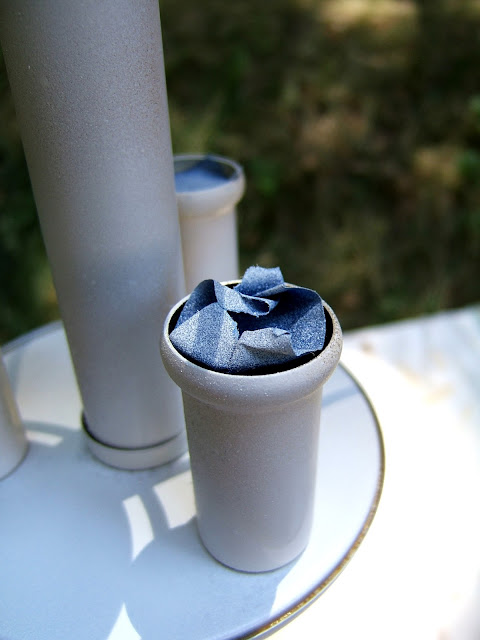
Once you've taped off the wires and the sockets, start priming. I hung mine from a sawhorse.
First you prime, then you paint. You know the drill with spray paint. Nice thin coats, and REMEMBER! Recoat within ONE HOUR or AFTER 24 hours... it's crazy that this rule actually matters, as if the paint had some sort of built in timer. I re-coated about every 15 minutes.Blurry pic, but you get the idea:
Now - I wanted more than 6 strands of cranes hanging down mine, so I decided to use an embroidery hoop to add a ring at the top of my chandelier. These simple and cheap babies are wonderfully useful:
After finding the right size, I rested it on the top and painted it green with the rest of the fixture.
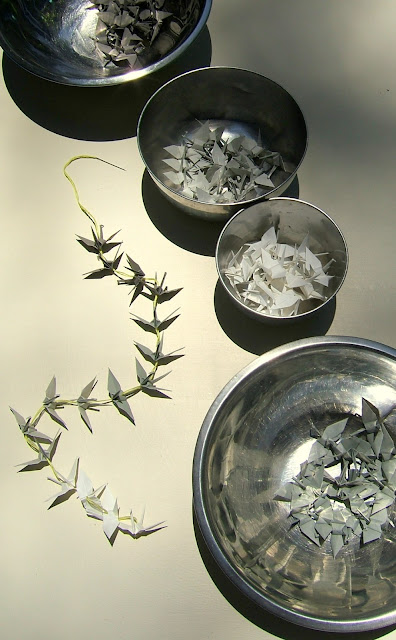
Now while your top coat is drying, time to string up your cranes. Since I bought mine (from origamiyyc) I saved a ton of time here. I know, cheating, but look at it this way - I supported another DIY'er, huh?
I wanted an ombre effect, and found that I had 50 of each of four colors. This doesn't divide evenly into 12 strands, but since I imagined semi uneven strands anyway, I divided like so: 6 strands at 16 cranes each, 4 strands at 17 cranes each, and 2 strands at 18 cranes each. If you stay consistent with the color order, you'll get your ombre.Just take your needle and thread, with a LONG piece of floss (folded in half, just like sewing!) and string them up through the bottom of the crane, and out the back (top) of the crane. A double knot at the end was enough to hold the first crane, and since the floss is so thick the cranes stay up on their own. Thank goodness! I can't imagine a knot after each crane.
Do this as many times as you want, I wanted a very full look, so I did 12 strands.
After those are done, you'd better get to wiring up the light. You DON'T want to deal with that after you have attached the birds. I didn't need much wire, so I just chopped the end off a 12 foot extension cord:
Since I'm not rewiring, this connection was pretty simple. I matched the ribbed side of the wire, to the ribbed wire in my fixture, connected with a wire nut and wrapped it up in electrical tape. And vice versa. If you are rewiring, you can revisit the Jute Wrapped Chandelier tutorial for some wiring tips. General rule is smooth wire to black wires and ribbed wires to white wires.
I sort of bent the rim of the part that mounts to the ceiling, because I needed the wire to pass through somewhere since I'm not actually hard-wiring this to the house.
Now, earlier you may have wondered "How did he attach that hoop the the fixture?" Fantastic question, and here's the scoop. To hold it in place I just used hot glue, but I knew that wouldn't last forever on metal, so the trick is in the crane strands that tie to the fixture:
I tied the floss around, then crossed over and back under, a few times. Doing this on each of the six arms creates a secure tie. Later, we will super glue the floss to the hoop, which will secure all the knots. Here's a close up:
So just continue on, tying your crane garlands to your light.
Once you're done tying, it's important to come back and add a dot of super glue to your knots. For some reason embroidery floss knots come loose over time, and once you've trimmed the excess string, retying will be impossible!
A lil dab'll do ya. Now plug it in, admire it, take some photos....
When it came time to flush mount to the ceiling, I held the fixture up and marked where my screws will go. I used the 2 existing holes in the mounting plate, but will be using long screws and drywall anchors to install them. Just drill a hole in your ceiling, install your anchor, then put the screws through the mounting plate and into the anchor. Done.
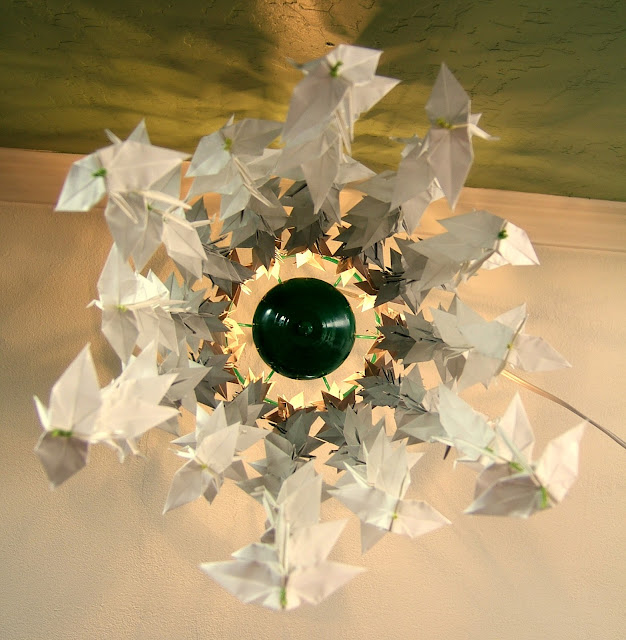
My last step will be hiding the wire, but that part is boring so I figured you didn't need to be subjected to that... hah. And now for some fun photos:Looking straight up:
So that's it! Took me about a day, lots of breaks and a lot of back to back episodes of Bob's Burgers on Netflix while I made the garlands. What do you think, will you give this project a try? I love how it came out, hope you do too! Here's the cover image if you want to pin it for later:
Enjoy & good luck! Send photos if you try it, I'd love to see all the different ones you all make! For more lighting projects, head to my Project Gallery and scroll down to "lighting".
-Jesse


WOW! this is so cool!!!! you always have great unique ideas!
ReplyDeleteThis came out so cool!! Awesome idea as usual!! Love, Mom :)
ReplyDeleteThis is so cool!!! I love upcycled chandeliers and this one is so different. Love it.
ReplyDeleteHello! This is amazing! I saw you featured on Better After :-)
ReplyDeleteSaw this on Better After - AMAZING, so creative. I love it!!
ReplyDeleteThank you all! I'm so happy with the lamp, I'd love to make a bigger one. Now when I see these chandeliers in thrift shops I can snag 'em!
ReplyDeleteGorgeous! I've been craving a lamp like this made to resemble a shoal of schooling fish (similar to some of the very expensive cermaic versions available). I wasn't sure how I would make make the fish, but origami would be perfect! Thanks so much for the inspiration!
ReplyDeleteoh my gosh! School of fish would be AMAZING! You've GOT to share that with me when you make it. Origami would totally be an affordable solution - I hope you share pics! Thanks for commenting :D
DeleteI have a larger version of this lamp and was going to donate it. So glad I saw your site before I did something so tragic. Brilliant and awesome idea!
ReplyDeletewow you really always build crane idea brilliant and different, love it
ReplyDelete