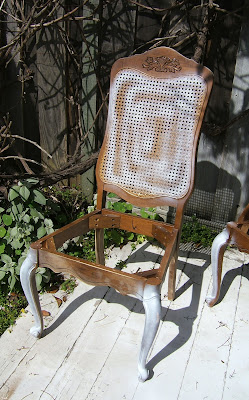
For today's tutorial, I decided to cover the revival and reupholster of old, old chairs. Chairs are a dime-a-dozen in the thrift store & garage sale world, but 99.9% of them are severely out of date. After all, Spring is here & we need some fresh chairs for all the guests we're about to have over, right? Right! Now as a heads up, this tutorial will be a little longer than our usual because of the steps involved. So refill that coffee cup, put the phone on silent, and get ready to give these nasty old chairs a complete 180°! Take a motivational sneak peak:
Materials:
- Sturdy cushioned chairs with a wooden seat under the pad.
- Orbital sander or sand paper
- Medium to Fine sanding pads or paper
- Steel wool - Fine
- Drill or Screwdriver
- Pliers
- Staple gun & plenty of staples
- Fabric Scissors
- Box Cutter
- Mask
- Gloves
- Primer
- Spray Paint in your color choice
- Upholstery foam & batting (if replacing)
- Upholstery fabric in your pattern choice (I used 2.5 yards for 4 seats)
- Optional: Air compressor, paint gun, air blaster, paint pyramids, clear coat
Alright, got your chairs? Let's start! Take a look at the set I have to
First things first, we need to make sure these chairs are actually sit-able. The last thing we want is one of our guests flyin' right through one of these because we forgot to check. Start by removing all your seats. This will give us a closer look at what lies beneath. If you've never done this before, the standard in manufacturing is to have four screws holding the seat to the frame. These screws go from underneath, so flip your chair over. You should see 4 holes in the corners, just reach a drill or screwdriver down there and pop those seats off. Done and done!
Look for any wobbles, creakiness, or joints that aren't connected and don't seem easily repaired. Here's one:
I should have taken a video, so you could see how much the gap above flexed when I moved it around. I mean it really moved... I couldn't see any easy way to repair it, so I felt it wasn't worth the risk.
Here we have another chair with a gap problem. Repairing this would involve dismantling, re-gluing, and reassembling - and we still wouldn't be sure if it was a solid fix. I decided to cut my losses, and stick with an even number of four chairs versus my original 6. It's truly not worth the risk. I broke apart the other 2, as I have plans to make that great wicker back into a wall organizer. More on that another time!
Once you have your set inspected and ready to start, grab your sander and slap on the sanding pad. I started with a medium, and finished up with a fine. Since I knew from the start I'd be painting these, I didn't spend much time sanding. Just enough to rough the place up, and give the paint something to cling to. Masks on everyone!
I love my lil' Kawasaki. Take a look below at this problem area. Some strange texture going on here on the handles. I don't know, nor do I want to know, how this happened - I just want to fix it. It sanded right off!
Here is the level of sanding you want to go for. No need to go all the way unless you are re-staining. I just went until it was smooth.
Time
to Prime! My favorite, this means we're really getting somewhere. I
used Rustoleum 2X primer. When it comes to chairs, or things with a lot
of detail, I tend to default to the spray paint. You could hand brush
primer no problem, but it will take you a lot longer. 1-1.5 cans was
about right for 4 chairs to get a good 2 coats of primer. Throw that
mask back on and some gloves. I know it's tedious, but you'll thank me
later.
Continue
priming until you get a good solid coat. Remember, when you are working
with spray paints, you need to follow their time rules. The rules are,
re-coat within 1 hour or after 24 hours. You'd think this
wouldn't matter, but it does. So set your clock, and get back out there
and re-coat before an hour hits, otherwise you're doin' it tomorrow,
friend.There we go! Looks like we're ready. I did 2 coats over the whole chair, and then did a third coat here and there where I noticed some weak coverage. Next up, use your fine grade steel wool to smooth any bumps or bubbles that may have sprung up. The fine steel wool is super gentle, and will smooth without removing that paint.
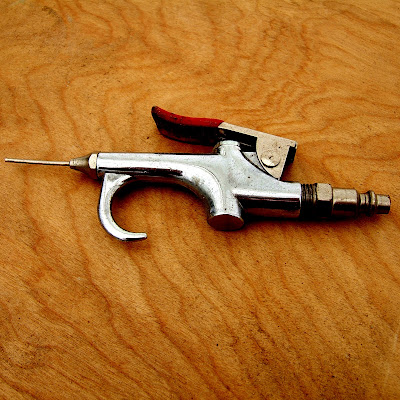
Now.. if you have an air compressor, this is a handy little attachment for in-between coats. Attach this puppy to help blast dust and spiderwebs from all the little crevices in your piece. Don't ask me why, because I can't tell you, but spiders simply adore spray paint fumes! It never fails, every time I spray paint there's a spiderweb or two draping over the whole thing. Crazies.
If you don't have an air compressor, a yard blower works too or a simple horsetail brush. It's important to clean between coats so you don't accidentally plaster dirt in between your layers.
Let's get past all this priming and get to the good stuff: our top coat! I chose "Navajo White" for these chairs, as it really complimented the cream in the fabric I picked out. That's another thing, I find it way easier to pick your fabric FIRST, so you can match your paint to IT vs. the other way around. But that's just me...
Remember, light coats, within the hour. Repeat, and repeat. You'll get a lovely finish. Here we are:
Don't you just love that I finally learned to collage my photos? Well I do. No more long strings of photos for this post, no sir. I'm pretty happy with my top coat at this point, and I think I have used almost 4 cans. In hindsight, I may have wanted to use my paint gun & air compressor for this job, but as you can see, the project is entirely possible without the mega equipment. Oh! Look at these little gadgets:
If
you're vertically challenged like me, you may need to lay your chairs
down on their back to have better access to paint the top & bottom.
These inexpensive pyramids (found in the paint section) help prop the
piece up, with minimal contact. The issue, is that if you lay your
chair directly on the drop cloth that has all that old paint, your soft
coats might grab a souvenir or two from the tabletop & add some
texture to your coat. I highly, highly recommend these little triangles
to save you time & stress. Enough rambling, I'd say we're done
with our coats here. Let that dry, and let's start on the cushions.
Oh
my, remember these beauties? How could you forget! Grab that box
cutter and start slicing. We want to remove the fabric, and I've found
it's a huge help to just slice a line down each side before you tear.
Throw that old stuff away!A surprise layer! We are so lucky... It's common to find multiple layers on your chairs, as people have been reupholstering ugly chairs for generations. When the going gets tough, it helps to use a screw driver to pry some of the fabric and staples off, as shown above. Below you can see all the staple shards standing up. Go ahead and use your pliers to yank them out.
I have to confess here, that I don't always pull all of them out. If they are flush and deep into the seat, I leave them. They aren't hurting anyone, and this is just the bottom side of the chair after all...Here we have a naked chair cushion:
All
done! Just kidding. Grab your fabric! It's time to make these seats. I
only bought 2.5 yards, and it was plenty. Make sure you use upholstery
fabric because it's much thicker. Regular fabric is thin, and runs the
risk of tearing if someone has buttons or giant sharp gems on their
pants, as is the fashion these days. You never know! You'll notice I've
left the shed for the safety of the indoors. It's much, much cleaner,
and therefore less risky of getting who knows what all over your
beautiful fabric. I recommend doing these steps inside. OK - Here's a
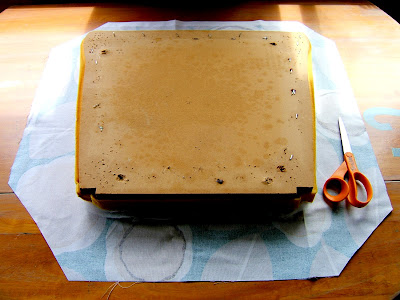
snapshot of my supplies:
First
things first, get those staples out. It really doesn't take long at all
once you get into a rhythm. Now, check out my layers below:It's upside down here, I have the seat, the foam, and the batting. If you will be replacing the cushion, you'll need new 1" foam and batting. Now I didn't need to replace my cushion in this case, but if you are, then you'll need to trace and cut the foam. Simply lay your seat (the wood) on the foam, draw a line, and cut. Do the same for the batting. Layer them like a cake, and now you're up to speed!
When cutting your fabric, you want to leave 4 inches or so excess around the seat. This will leave you plenty of fabric to wrap around & staple. Do a test pull before you cut your fabric to size, like so:
Great work, we're almost done! As you can see below, I cut the corners off mine. Not everyone does this, but I feel it makes it a little easier to work the folds later on. This step is entirely optional, just be careful not to cut too much.
Begin folding over your fabric. I usually start with one side, pull it over the edge and put in 1 or 2 staples on what will be the bottom of the seat. Then go to the opposite side, and pull it nice and taught, and do 1 or 2 staples.
Continue this back and forth stapling for the other two sides, and around the whole seat. By not doing one whole side at a time you give yourself flexibility to pull all sides evenly. You'll see once you're working with it, that you can pull to make the foam sort of.. smooth? It's hard to explain, but I'm confident you'll know what I mean. You want nice smooth edges, not lumpy ones.
After stapling all the sides, you are left with floppy dog ear corners. The best way I can describe the next step, is to think of wrapping a present. Or doing a "hospital fold" when making a bed, though I don't think anyone makes their bed that neatly anymore, ha! The goal here is to get your fold as flat against the sides of the seat as you can. You want these to be as invisible as you can make them. Play with your fabric and fold before you staple. I folded my front two corners, to the sides of the seat. And my back two corners, to the back of the seat. This way, I have a smooth front. I hope that makes sense!
After you've finished your corners, trim the excess fabric off. Staple down any loose tails so you have a nice clean shape.
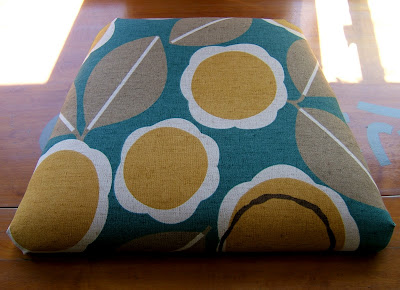
Side note: I use fabric scissors, which essentially are just nice scissors that I labeled "fabric". The reason is so that no one else in the house uses these beauties for paper! Paper dulls the blades, and before you know it your scissors won't cut anything. This pair has lasted me eight years already (no foolin'!), and still cuts like a dream. come. true!And there we have it! Now do this for the rest of your seats and we're practically finished.
Some
people "scotch guard" to help prevent stains, etc. I do not, mainly
because I've never used it before, so I can't help you there. For all I
know it could be miraculous, let me know if you have any tips.
Let's
see, now that we've finished both the frames and the seats, all we need
to do is reassemble. Here's where you have the option to seal your
frames if you like. Choose a clear coat in the finish you're looking
for, and be sure to follow the directions for re-coat & dry times.
I've seen many a clear coat bubble up from being too hasty, and that'll
set you back a few days.
Once
everything is dry and has had time to fully cure (usually 24 hours
minimum) we can screw the seats back in. Working backwards from
dis-assembly, just put your seat upside down on the edge of a (clean)
table. Then put the frame upside down on top of it, line it up &
screw it in. Another way to do this is just place the pads on the seat,
right side up, and have a friend sit there. Then just crawl under and
put your screws in, Michelangelo style. There you have it:
That wasn't so bad, huh? Just time consuming. Here's one of the whole family:I think they came out adorable. That fabric is great, it really led the way on this project. Though I can't help but think of sunny side up eggs when I look at it. Cute either way! In-case you forgot how they looked before, here's a little side-by-side:
I
believe we can call it day! How'd you do? This project is a bit more
involved than many other projects we've focused on, but the outcome is
always impressive. 98% of people are scared to death of re-upholstery,
so go ahead and impress them with your new found skills. After all,
you've earned it - this was a long tutorial to read! One last tip, is
to put a few felt pads on the bottom of your chairs. It's just so much
easier. Now take some photos, you worked hard!
Thanks
for tuning in for yet another session of School of Restoration, I hope
you enjoyed today's topic. This was a fun tutorial to make, it was
great to see these chairs get a total overhaul. I've been asked many
times for advice about chairs with cushions, so this is long overdue. If
you decide to re-do your chairs, send the pictures our way - we'd all
love to see them!
If you missed the last few tutorials, you can find them here, here and here. And if you're wondering who in the world wrote this, my name's Jesse, from Nine Red, and all that info is right here.
I'll be back next month for another how-to-torial in the School of
Restoration. Until then, plant your
summer veggies & enjoy the longer days. Class dismissed!


Awesome tutorial!!!
ReplyDeleteBest one yet!
ReplyDeleteJesse you are the new master of the tutorial. And yes, I have noticed that teeny weeny spiders always get stuck in my spray paint. They must be attracted to the smell. Great tip. Love the fabric choice too.
ReplyDeletethat looks fabulous- i LOVE that fabric!
ReplyDeleteThis comment has been removed by a blog administrator.
ReplyDeleteThank you all so much!!
ReplyDeleteYou are amazing! I love thrift shopping and I am making myself a hollywood inspired vanity one of these chairs made over will look fabulous
ReplyDeleteSounds great! Chair make-overs are so much easier than people think. Have fun!
DeleteI just discovered your blog, and this is a great find because I have 3 starter projects, and one is exactly like these chairs! I already did the reupholstery, since I've done that part before, but I will be following your steps with the painting. That was the color I was going to use, even. So, bingo! :)
ReplyDeleteSpray painting chairs is a huge shortcut! If you've ever had to paint one by hand, you wonder what you're getting into, haha.. It did take quite a few cans since there were so many chairs. However, if you have an air compressor and gravity feed gun... it'd save a few bucks on cans. Share your chairs when you're done! I wanna see :D
DeleteI totally will. I only have one chair -- but I want to make it kind of a statement piece. I'm glad there was only one because I had to completely unscrew the support pieces of the seat and legs to add some wood glue for support. Whoa! And then I realized some of the curved wood along the front was broken off, so I re-shaped it with wood filler and sanded it just right. I'll be glad when I can take that "after" picture!
DeleteThis comment has been removed by the author.
DeleteAll right, geez... I finally finished the chair! Your instructions were helpful (love all the pics)! I'm not sure how to link a photo here, but if you go to my front page, the chair's near the bottom.
Deletehttp://theyellowloft.weebly.com/
WHOAH! Stunning! they came out really nice, good work!
DeleteThanks a bunch! (The only thing I might add to the tutorial is "make sure you don't staple tons of fabric over the screw holes in the wood base, or else have an ice pick handy." Ha!
Delete