Google+ Nine Red: Home Improvement
Showing posts with label Home Improvement. Show all posts

Wednesday, October 1, 2014

Backyard Patio: Tree stump to Day Bed

You know what I realized as I set out to write this post? I completely skipped out on showing you how we turned the stump into a bench in the first place! So this post got twice as long, oops...If you aren't caught up on all the backyard going-ons, I've been trying to tidy up this project for a bit - you can read up in these posts.

So you've seen this picture in some of my updates:
Well as much as I wish that bench would have magically appeared on it's own, it didn't. We had to get real crafty on it, and it was no easy task. Here's what we had interrupting our deck:
Big ol' stump.  Whoever cut it down decided keeping the stump & building a deck around it was a better idea than removing it.  So we inherited it, and after brainstorming for weeks we got hooked on the idea of a large, outdoor daybed/couch type dealy.  The first hurtle was figuring out a seat.

(Now, if you like this idea but don't have your own stump, you can build this over any frame. Even two wine barrels would work. Or just four sturdy legs.Or two piles of pallets secured together to be the right height. Anything.)

After Ralph leveled out the bumps as best he could, (Sander with 80 grit paper!) it was time to devise a sturdy seat.  We played around with some spare wood, seeing what arrangement they needed to be to maximize space.  Plus we were trying to see if we needed to build some sort of frame, etc. Some boards didn't make the cut:
Well it turned out the simplest idea was the best, and building right on top of the stump seemed strongest. After cutting our boards to size and placing them on the stump, we flipped the whole thing over face down (keep the same order in mind!) & braced them with more spare wood.  I made sure to pre-drill some pilot holes so the deck screws wouldn't split the 2 x 2 braces in half.
These wood screws are the best, they come with that little star bit. I was skeptical, but they work amazingly better than a standard philips:
I used the same wood screws to screw down into the stump.  HERE IS ONE OF MY MISTAKES. When the platform we had just build was one piece, we set it on the stump. Amazingly, all was level! So I started drilling down into the stump, and as wood does, things twisted and turned creating a few uneven moments in our lives.  I suggest, if YOU are working on a stump, to look underneath and add some wood shims where needed. This would have solved everything. EVERYTHING!

But in the name of progress, I carried on, adding some custom legs until most things were level:
There was still the tiniest bit of unevenness in some areas, which is unnoticeable when you sit on it. This, helped me decide to make the chunkiest seat cushion on the planet.
Then I sealed the whole thing is the Spar Urethane from our bar project.
Now you are all caught up! It's time to get some arms on this puppy! I've said it before and said it again, sometimes you have to be flexible and let your project be your guide.  The original plan for arms & a backrest was the oh-so-popular Pipe & Flange construction. (Like these).  BUT!!! Do you know how expensive pipes can get? It's the flanges that are the worst! So the total, without lumber, for the pipes on this couch was $180.  I bought it, sat in the car in shock for a second, and then returned it. Yes, I was that horrible person in the return line with like 800 tiny pieces. If this was going to be some gorgeous shelf inside our home, OK - I'll spring for it. But this was to be armrests. Hidden by pillows. OUTSIDE. Not worth $180 in my book.

Our new plan, was to not be lazy and figure something out with the 2x4's we had on hand. This brings out cost down by like $170. Seriously down to like $10. 

I imagined & then designed this shape:
This, would be, an armrest, that also acts as a back brace. Now, it will make sense in a few photos, but it's on it's side here.  The bottom longest side matches the depth of our bench, and the height of the armrest is about 14" (front).  The top of the armrest is the same length as the bottom, minus the thickness of the backrest. The backrest is the piece that sticks up past the rest.
All pieces were cut with 45 degree angles.  I added wood glue, the corner clamp, and shot some nails in using my nail gun that I bought for our downstairs bathroom ceiling project.  Because I'm paranoid, I still shot some wood screws down into the 2x4's after. If you think yours will get heavy use, throw some "L" brackets on the interior of this puppy.
So you need two of these. Identically the same. Then you just place them on your surface, and measure the length you want the back pieces.  Start chopping your spare wood:
Once my pieces were cut, I laid the armrest / backrest on their backsides, and starting playing around with board spacing:
I used a spare 2 x 2 to evenly space the boards before I glued & nailed them in as well:
Once everything feels secure, stand it up. If things feel wobbly, lay it back down and reinforce with either more nails or some wood screws.  Everything can be painted afterwards.
Now it looks like a bench!  With this technique you can easily, and cheaply, add a back to many different surfaces. Upon closer inspection:
Since we had a mix of wood, old & new, redwood & pine, we decided paint was best. We used an exterior paint here, since this would be outdoors.  We used or paint sprayer that connects to the air compressor, but if you don't have that, consider painting your pieces before assembly, and touching up afterward.
You can see the left side is sticking up a bit, this is because one of my boards was acting squirrely and twisty, but I knew it would settle down in a bit. And it did! After lining the backrest into it's permanent spot, more deck screws went down the bottom sides of the armrests into the platform.  Then we staged for fun:
See that lovely giant cushion? Haha... well it got SUPER fluffy when I had it on it's side for the day, so we were forced to nap on it to get it back down to normal. What a pain....

No pillows:
 Pillows:


I joke about this area looking like a Southern Mexican restaurant, because it got super colorful on us. I guess neither Ralph nor myself can say no to color. With each project we had that moment of "what do we paint this?" and the answers were almost always something bright.  I'm amazed we got as much white in there as we did, but I think it really ties things together nicely & adds a sweet trim.

Ok so NOW it's our cantina patio I think....:
Now there are still little details to this zone I'm finishing, but for the most part I think the big stuff can be considered done!

Before:
After:

Oh, Happy first day of October!

-Jesse


Linkies: FacebookPinterestInstagramTwitterSubscribe & of course, Email me.
Thank you for visiting Nine Red .com

Post a Comment

Friday, August 30, 2013

How To: Hang Perfect Pictures

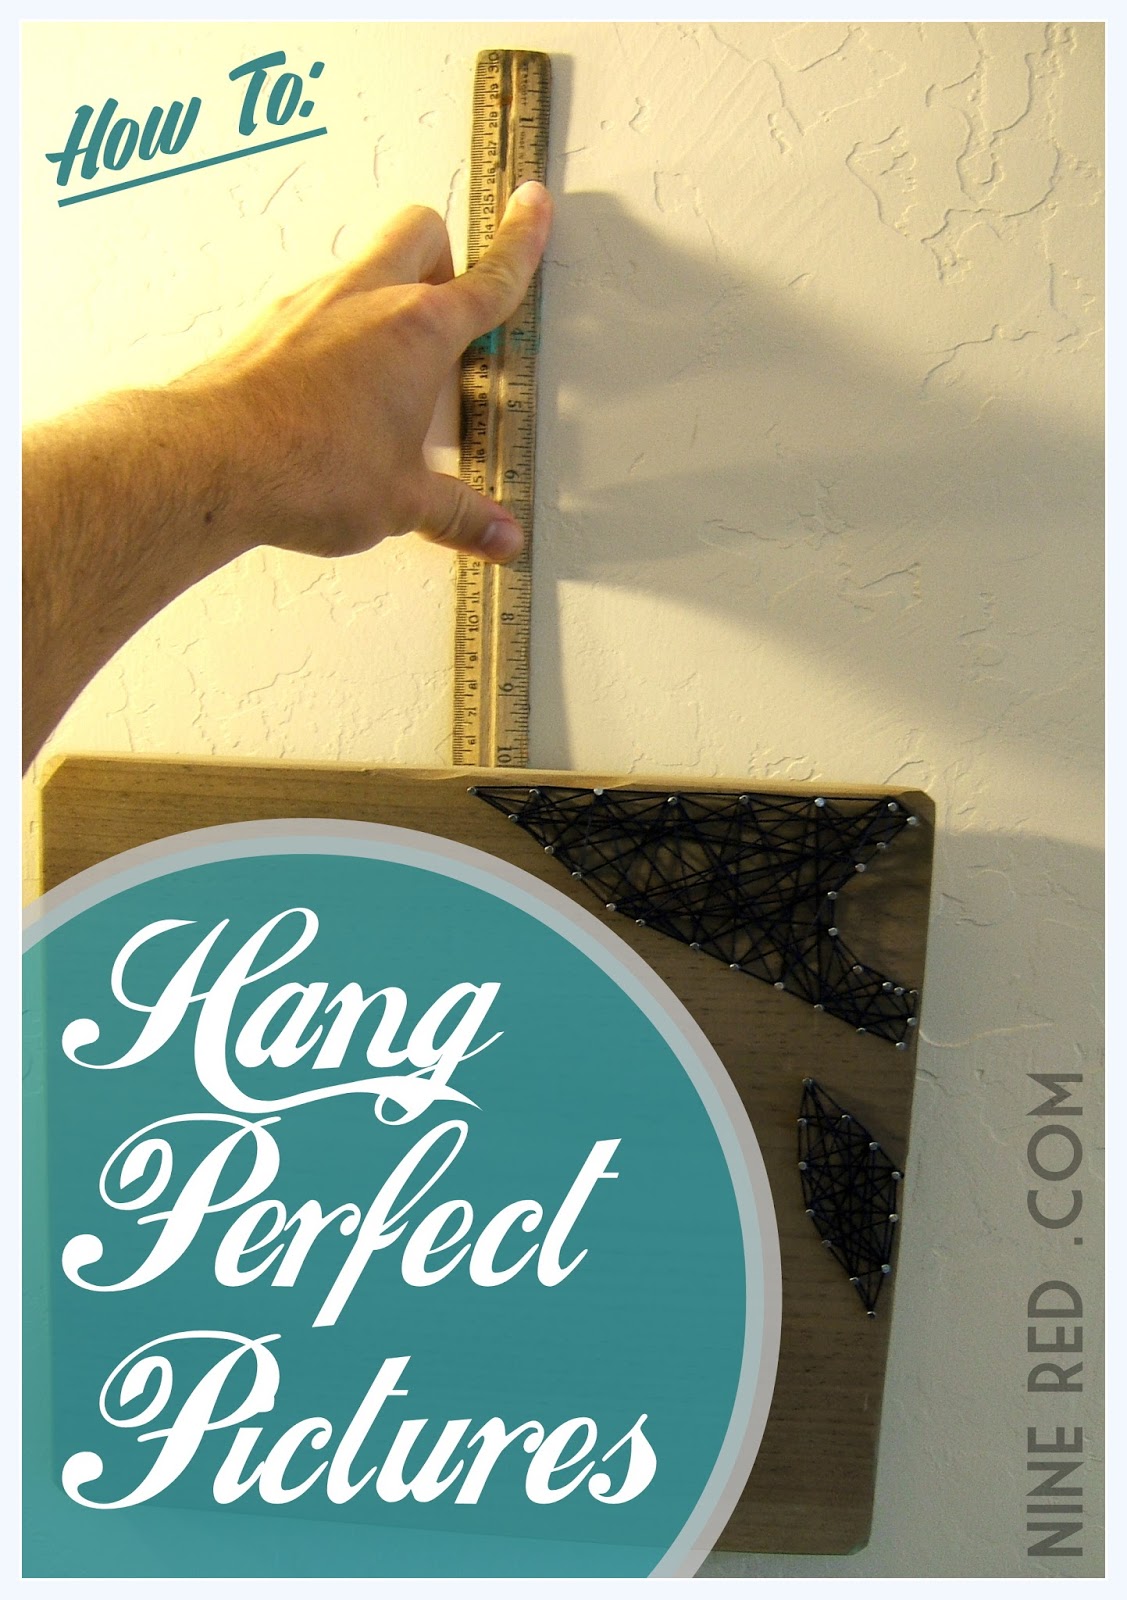
Earlier in the month I showed you my gigantic Marilyn Monroe string art piece that sits above my desk. Some of you wrote me and asked how I was able to hang each piece without nailing 65 different holes in the walls to get it right, and I'm here to share it! It was the first time I tried this technique, and it was definitely the easiest picture hanging experience I've ever had.    Ever.
I originally came across this awesome tutorial on Celebrate Everyday, who saw it on Pinterest - I'm sure you all have too. So it's been circulating for a while, I shared it with you all (because it's genius!) a while back, and finally got to put it to the test.  I needed to hang the 12 tablets that make up Marilyn, which was really intimidating as they needed to line up.  Here's a lovely photo run through:
  1. Hammer a small nail halfway through the end of a ruler (anywhere near the end).
  2. Make sure it sits half in, half out.
  3. Use the nail to hold your picture, and float it to the wall.
  4. Line the picture exactly where you want it, and use your free hand to hold the ruler against the wall.
  5. Remove the photo (while keeping the ruler in place) and push the nail into the wall with your thumb, to make a mark.
  6. Remove the ruler & don't lose that mark. Circle it in pencil if you need to.
  7. Hammer a new nail into the mark you made, and put the photo back up. It should hang exactly where you had it before. 
  8. Repeat!
That's it! It really was easy! What I thought would take me hours to do, took about 45 minutes. for 12 tablets. I felt so proud that I didn't have to repeat any, why haven't I tried this before? I rewarded my productivity by not doing anything for the rest of the day. I mean it looked like I did a lot, right? Heh... right.  This would be perfect for arranging a gallery wall, especially if you don't have all the pieces collected for your gallery yet.  Easy to add onto.

So that's that. We're done.  For this post I tried to go more, condensed, Pinterest friendly tutorial style - but if you're the type that likes more details, they are all included - photo by photo - after the break. 

Have a wonderful Labor Day weekend everyone!

-Jesse

Linkies: FacebookPinterestInstagramTwitterSubscribe & of course, Email me.


Post a Comment

Friday, August 9, 2013

Installing a New Faucet

Last weekend our lives were forever changed.  We installed our new kitchen faucet! Life changing might be a little dramatic, but seriously - this pup has had such an impact on the dish doing life. I'm in love. And you know what? It was SO easy! The hardest part was figuring out how to remove the old one. That took FOREVER. It was like a puzzle... a rusty, mysterious puzzle... Here's the newbie:
wee-woo! I don't know how to spell that nasty wolf whistle, but you get the idea.  What a beast, huh? It's the Price Pfister Mystique - oh la la... Here's the link for more info.   Picking a faucet was a piece of cake. I was pretty lost as to how to know what would fit, being my first time and all. I went under our sink and counted 4 holes, and I was able to sort the Pfister site to only show faucets for 4-hole sinks, and it was good.

Read along as I tell you the tale, that is our new faucet....

Post a Comment

Tuesday, July 30, 2013

Painting the Living Room Green

Little by little Ralph and I have started working on the living room.  We spend so much of our time in here that's it's hard to leave it until later, even though we should be outside doing retaining wall projects.  These are just more fun.  After we whitewashed the fireplace we thought it would stand out more if there was a little color on the wall.  A little turned into a lot, and we chose Martha Stewart's "Rhododendron", take a look: (Ignore the towel on the floor, we were preppin' to paint)
Grr... that heater! Originally I wanted to take it off, take it outside and give it a high heat spray paint job, but it's wired in, due to a blower on the top. So that project is not as easy as I thought it would be... someday. I can't stand that spot!  Here's the after:
I love it! I've never gone with this type of a green before, but it makes for a very comfortable living room. It's weird too, in the daytime it's more of a soft green, and it night it has a hint of lime in it. It was a bold decision that made us a little nervous at first, but we figured we could always paint over it, right? I'm happy we finished... Here's the other side:
There are normally really ugly book shelves under that window, more on that soon.  I think the size of this room really helps with the green, we don't feel closed in at all. In fact, it's bringing the room together in a good way.
Because remember our couch is also green:
Which you might think, take it easy pilgrim - too much green, but the couch is kitty corner (is that the right saying?) the green, so they don't touch at all.  When you're sitting on the couch you see green across the room, and when your standing in front of the green wall, you see green couch opposite you. Make sense? I'll have a whole tour soon, we're doing all kinds of projects on this room.

So that's an update, we did this a while ago recently and I've meant to post, but so many other fun tutorials hopped in the way. Stay tuned for a how to on that TV stand in the right of that picture, we built that too.

Thanks for stopping by! Enjoy your day :)

-Jesse

Linkies: FacebookPinterestInstagramTwitterSubscribe & of course, Email me.

Related Posts:

Post a Comment

Friday, May 24, 2013

Curb Appeal: Wonderful White Paint

In my past, white has been the most under appreciated paint color in my book. We totally fought.  I used to think it was boring, and just avoided it as much as possible.  Maybe that's because I always lived in apartments where I wasn't allowed to paint, so everything was stark white.  I was surrounded by it during a time when I craved color, big time.  Then in our last house, the landlord gave us the all clear to paint whatever we wanted, and I about exploded. Color everywhere, which you can see an example of in this old post.  And you can see even then, with the white trim, that I was just starting to embrace and appreciate white. That was a beach house in Santa Cruz, so wild colors went over real well & matched the 'hood.

Then I started to try white a little more. Now don't get me wrong, I LOVE color (yea, seen the guest room? hehe..) but I've really come to appreciate the difference a little white paint can make.  When we painted the pergola we constructed out front, we bought a gallon of that white, figuring we would use it all over the yard.  In attempts to make the house a bit more welcoming from the street, we decided to tackle this crazy retaining wall along our driveway:

Come on white paint, save the day, please.

Post a Comment
Wednesday, April 24, 2013

Patio Progress: Building a Pergola

On Monday I showed you all how we kicked down the walls (literally) of our "unique" patio (click here if you missed that), and today I want to show how we polished that up:
Yay! I am happy. What used to be such an eye-sore is now becoming pretty cute... and while it wasn't hard, it was a bit time consuming - most of which was painting the existing structure. I was NOT about to take it apart just to paint it! So up the ladder I went.  Let's see, on Monday we left off at this point:
...and today will be picture-palooza (don't say I didn't warn you!) of the finishing touches.  After kicking the walls down, tearing off the plastic ceiling, and realizing that this would actually be a fantastic pergola... the new goal was cute-ification, which only involved a lot of paint & 2x2's.   Here come the photos!

Post a Comment

Monday, April 22, 2013

Patio Progress: Using Our Feet

Hey everyone! Hope you all had a fantastic weekend! Since it's Monday, I figure I can distract you from work with an update on the front of the casa.  We've been really getting into the fix-up-the-outdoors spirit lately, and one of our biggest pet peeves about the front of the house was this outhouse style covered patio (original whiny post here):
I imagine the last owner wanted more privacy or something, but we are not like that last owner at ALL - so this thing had to go.  It started innocently, we went outside to do some basic yardwork, and as it always tends to go, we got majorly distracted.  Before you know it, we were kicking (yes, KICKING) the semi-rotten patio walls down.  It. Felt. AMAZING.
***UPDATE: See the finished patio here***

Our original plan (seen here if you are just joining us) was to maybe cut the wall in half, make a decent banister and a semi-enclosed patio.  Nope.  We just through it all out the window and decided to make a pergola-like structure, which completely by accident, now looks as if we have a front door!  Please folks, if anything, let this post inspire you to tackle these seemingly intimidating projects around your home.  This was WAY easier than we thought, and I wonder why we didn't do it first!

OK, let me show you the progress pictures of this rewarding endeavor - lighting was hit or miss that day, so please forgive my photos!

Post a Comment

Wednesday, February 6, 2013

DIY: Disco Ball Inspired Sun Tunnel

Have you ever wanted a giant disco ball-like effect in your home? Me too, who hasn't? :)  Ok, maybe I'm alone on that, but after seeing this DIY you might just change your mind...

This isn't so much a do it yourself project as it is just an put-this-all-together yourself project, but it's still super fun! So we have a sky light in our living room that has a drywall tunnel beneath it since we don't have vaulted ceilings (yet! look out drywall...), and when the sun shines in that light the entire thing glows. That's all well and good, but let's really make it sparkle!
Oh yes, we took it there. It's nice to know that all those years dancing beneath the disco ball had a lasting effect on my subconsious, because I always seem to want to throw mirrors in my windows when the sun shines in. Hmm.

Anyway, when I saw the sun pouring in you just know I had to glam it up.  Everyone needs a little disco, right? Right. This project seemed easy enough: get some mirrors, get some self adhesive.. done. Well, not so much... one by one these mirrors came crashing down (luckily none broke) like a mini meteor shower, until I figured out a solution...E-6000. 

UPDATE 5/20/2013 - A few of my mirrors have been really stubborn and won't stay up, so I'm using the plastic clamshell mirror hardware to secure them. success!

Post a Comment

Friday, January 4, 2013

Tile Entryway Project: Part 1 of 2

So we are completely in the new house. No more back and forth, no more boxes up and down stairs, and especially... no more fast food! Don't get me wrong, fast food is delicious, but when you are so low on time that you are eating it almost (ok, every...) meal? That can do a real number on a body.  But we're getting settled, getting used to the place, and jumping into the projects.  This weekend calls for rain (of course!) so we've decided to tackle a project that one of the cats moved to the top of the to-do list. Meet, Tyler:
Aka T-Bop & T-Bop Shakur, respectively.  Oh, Tyler - look what you've done! Cats have a way of sending you a message, in this case it was let. me. out. Regardless of the 30 degree weather, this spoiled brat wants in and out priveleges, exactly when he wants them.  This does not agree with our carpet,

Post a Comment

Related Posts Plugin for WordPress, Blogger...

Shareaholic