Google+ Nine Red: Planters
Showing posts with label Planters. Show all posts

Thursday, June 26, 2014

Quick DIY Secret Mossy Hiding Pail

Well I guess not so secret anymore now that I've blasted this all over the internet.  Oh well, I guess if you come to my house you'll know this secret spot & head straight to it. 
Good thing for me that I don't keep anything in it! Yea, I've always had some weird obsession with hiding places. I used to hollow out books, just because it was cool. And then I'd put them on the shelf. Empty. I don't have anything to hide really, no gold coins & cash burns a hole right through my pocket.  But, during this fail-fix I couldn't resist the opportunity.  

It all started during that long winded downstairs bathroom redo, one of my accessories was to be ferns. I chose ferns, because that room is "light challenged" and I figured they'd fit right in. Look how they did:
Mind you, this is not a case of not having a green thumb, I have a bunch of healthy plants that will tell you otherwise - I gave this puppy everything I had, and he quit. Fast forward to problem #2 - I used a wood bucket.  Even though I had the fern in a separate plastic pot for drainage (I thought I thought of everything!), and sealed the heck out of the bucket, the water seeped on through.  But whatever, we all have fails & new things sprout from those, right?

I wanted to rush out and buy (see what I mean about the cash problem) something else to go here, but in an effort to try and use-what-I-have-around-here, this is what I came up with. And it's what I should have done in the first place. (sorry lil fern...)

Step 1: Paint the bottom half of the bucket. This was dual purpose, it hides the horrible water damage to the bucket, and looks all color-blocky.  Unsuspecting people will think this was the plan all along - good!
Step 2: Raise up the floor so I don't have to literally fill this bucket with moss.  This is where the secret hiding spot came in at the last minute! I hoard keep all those jars from finished Bath & Body works candles & freeze the wax out (freezing the candle is the easiest way to get the wax out - just take a butter knife to it to crack out the wax). They are super handy, and this one fit perfect:
A little newspaper padding to keep it steady......pop the lid on....
Step 3: Fill her up with moss! This is my favorite moss, it's about $26 on Amazon (find the link here) for a HUGE box of it, but you can find smaller packs too.  I use it all the time, I cover the soil in my other houseplants with it, just to make them even cuter. Because, why not? Back to the bucket:
Done! Much cleaner. I love that fluffy lime stuff. I still get my touch of green in here without having to buy a fake plant, and a hiding spot too. Again - because, why not?
From failed to fixed in like, 15 minutes. And it didn't cost me a thing since I had it all here.

Back to work on the backyard brick patio for me...  enjoy your summer!

-Jesse


Linkies: FacebookPinterestInstagramTwitterSubscribe & of course, Email me.

Post a Comment

Friday, January 24, 2014

DIY Air Plant Hanger Collection

Hello again! I'm trapped in the house while a plumber fixes our water heater.   It was a leaky pipe, and while some of you may say "why didn't you try to fix it?!" - well - sometimes you have to know where to draw the line in DIY land. And the thought of us screwing it up and losing hot water all together while we wait for a pro to come clean up the mess, sounded horrifying.  And cold.  Anyway,  I've had a gallon of coffee - what a perfect time for me to waste the morning on Pinterest! As we polish up the details in kitten's bathroom the downstairs bathroom, I really wanted another plant in there.  I was going to do this terra-cotta hanger from Design*Sponge but thought it might be too bulky for that tiny room.  A few brainstorms lighter I realized, what could be lighter than an air plant? And the search began. I haven't decided yet who's taking the lead, or if I'll invent some newbie, but here are my faves:
Did I mention they are mostly D.I.Y.? Even better... I have buckets of craft supplies around this place, I'm sure I can get away with not buying a THING (except for the plants) for one of these beauties:
DIY Himmeli Air Plant Hanger from Smile & Wave
Have you noticed a trend with all the Himmeli stuff floating around? Well, it's popular because it's gorgeous, and this copper & geometric spectacle has taken my heart.  I had to look up what himmeli meant before I would allow myself to use the word, and luckily it's a simple definition:
  1. A type of hanging, mobile decoration made of straw or other similar material. (Source)
Hmm, pretty spot on. Easy enough.
Upside Down Air Plant Hangers
Heeey! I love these, and even though I strayed from Design Sponge's other plant hanger, they reeled me in with this one.  Don't those look like ceramic? They aren't.  Check out the full tutorial here.
Wall Hanging Air Plant Sculptures
Now these are different, instead of hanging from the ceiling they took it to a wall mount.  I love the hand sculpted look, very clean & light - which is what I'm aiming for.  Plus, they take very few materials. Nail, Wire, Clay... Hop over to BHG for the tutorial.
Hanging Terrariums on Chive
Ah, nothing better than a classic. These, obviously, aren't DIY at all, unless you're an amazing glass blower - in which case - sister get in touch!  I'd love to learn glass blowing, or at least beg someone who blows glass to make me something pretty.  Found these on Chive.
Himmeli Air Plant Hangers
Keeping with that Himmeli spirit, you have these gorgeous wonders... Now, you may be able to figure out how to make those, but you also may just want to support the person on Etsy who did, either way - these are adorable.  Hey, notice they are using spider plants instead of air plants? I wonder if that would work.. check out their shop. So many Himmeli goodies..
Now this little diddy, doesn't have a source (so frustrating when that happens on Pinterest) but, you can pretty much figure out what's going on here. I like the use of embroidery hoops because they are clean, circular, and something I have too many of.  Yarn, I mean, who doesn't have that lying around? This is definitely a cute & quick fix.

I've saved the best for last...
Gaaah! How do you spell the sound of a jaw dropping? That curtain of air plants is absolutely stunning, and might just end up as an installation on our patio this summer. Scratch that, remove the word might and insert definitely will end up on our patio.  Again, Pinterest failed me and the source led to a close up photo of it, but I'm grateful to have even seen it at all.  It looks like either thread or fishing line, strung around air plants. Fan..tastic. and simple.

What do you think? Air plants gonna make a debut in your home? Don't be misled by the name though, air plants do still need a little water depending on their placement. Whether it be a misting every few weeks, or a 2 hour monthly dunk in a bowl of water.  Whoever you get them from should have plenty of care instructions for your new baby.  There's like 3 million on Etsy, and every nursery in America is probably slinging these things by now.

Which hanger is your favorite? What other awesome plant holders have you made or seen around? 

Enjoy that weekend folks!

     -Jesse

Psst... saw this after I posted, check out Very Shannon's mega round up of DIY hangers... so cool!


Linkies: FacebookPinterestInstagramTwitterSubscribe & of course, Email me.

Post a Comment

Monday, June 24, 2013

DIY Simple Raised Bed.... on wheels!

Last week I posted a lil tour of the front deck, now that it's finally coming together. If you missed it, check it out here.  So with this tour will come a lot of tutorials, most of which are super easy.  Luckily I've made many of the mistakes FOR you, so you don't have to...isn't that sweet? So first up, what started the front deck redo project, a raised bed:
I may have mentioned before, we have deer. Not just the occasional deer, but the visit 3-4 times a day type of deer. So an herb garden within their reach seemed out of the question, which is why we redid the front deck first. I love to cook, and this deck is right off the kitchen, so perfect, right?  I wanted a good sized raised bed to grow herbs in, and started dreaming up this little beauty. I wanted the rustic look, so I went with fence lumber.  It was also cheap..another quality I love.

Wanna make one? Hooray - Here's what you're gonna need:
  • Wood! I used Redwood fence boards.  I bought 2 - 1x8, 6 foot long pieces.
  • A 4x2 OSB board.  These are around $6, and will be the base.
  • 1 - 4x4 - 8 feet long. 
  • Set of casters (optional but recomended)
  • Wood screws
  • Nails
  • Hammer, Drill
  • Minwax Polycrylic or other wood seal.  Gotta protect the bottom from moisture!
  • Your choice of tool to cut wood with. I used a  Miter Saw.
  • Optional: 2x2 - 4 feet, for bracing.
OK and now your cut list:
  • Redwood Boards - Cut two 4' pieces, and two 22.5" pieces.  Why not just 2'? Here's where you learn from me. In order for the bottom to sit snugly underneath the sides, you have to compensate for the thickness of the longer sides. Hope that  makes sense. 
  • OSB - leave it as is, a perfect rectangle, hooray for shortcuts.
  • Four 2' long 4x4's. That should use the whole 8 feet you bought. 
  • Optional bracing: Cut your 2x2's to 2 feet long.
So here's our empty spot. A weird greenhouse window in our living room of all places has left this area of the deck pretty useless. Until now!
Here we have everything laid out all nice n pretty:
Notice the bottoms of the 4x4's? I was just goofin around with the miter saw.. it was fun, I'm learning. If you do that, just make sure you don't cut the angles so steep you can't attach the wheels anymore.

First step? I laid the 4x4's down, and attached the short sides.  I used nails first then screws after. I like to mix it up...go ahead and line the sides of the board flush with the sides of the 4x4s.
Then I just stood the two sides up on their sides, and attached one of the long pieces.   You can line that board up flush with the sides of the two sides you already made. It sounds confusing to explain, but you're smart, you'll see what I mean. Nail, nail, screw, screw...
This is breezing by isnt it? Flip it over and attach the other side, as you might of guessed. Now, for the bottom, obviously those 4x4's are going to cause a problem right? Well, just chop some corners right out of that OSB.  Measure your 4x4's, they are never exactly 4" wide.  Cut corners of the same size out of your OSB.  Or you could put the OSB on the ground, frame on top upside down, and just trace...up to you. I just kind of went with it. 
Gently throw your frame upside down, slide your OSB on, and go crazy with the wood screws.  You can see my errors here, that it's not lining up perfectly, and my corners have trouble. This is because I didn't measure correctly, and why I'm warning you to measure twice and cut once.. see what I mean? I've worked the kinks out for ya.
If you opted for the 2x2 bracing now's a great time to throw them in.  Just place them along the inside sides of the 4x4's, and attach absolutely everywhere. While you have it upside down, attach your wheels. They should be pretty self explanatory.
Well there you have it! A planter box. Nevermind those blocks of wood on the inside, that was my brace job because I messed up. Ugh, will I ever live that down? Sure, soon as the dirt hides my mistakes...hehe.

**MUY IMPORTANTE** Osb is chipboard, and will eventually absorb the water (so I'm told).  Drill drainage holes and be sure to seal the inside (and outside if you want) of the planter with any kind of seal. I chose minwax polycrylic because I had it on hand. I didn't seal the outside because I want it to age gracefully, adding to our mountain charm, hah...

Well I think we're done, here's a shot of the optional bracing location, if my description was lame and didn't make sense:
Ha! The graphics kind of look like a bunny or chipmunk face... haha.. ANYway...

Grab some dirt and some plants and get to it:
 Parsley:
Goofing around with the camera & the sun...
Strawberries:
Dwarf tomato, for patios:
One of 10 basil plants ( I love basil!):
Great, you made it to the end! What did you think? It's fairly easy. I'm sure there are millions of planter plans out there, and this is just another one for the pile.  I know it might not last 100 years, but for the cost, ease of assembly and the fact that it's pretty light duty, this is perfect for our herb deck. Seriously this took me about 2 hours, with a lot of breaks. (I get so distracted)

If you decide to make one, share it with me! I love seeing your projects. Hope you have a fast week ahead & can get back to the weekend!

Muah!

-Jesse

Linkies: FacebookPinterestInstagramTwitterSubscribe & of course, Email me.

Post a Comment

Wednesday, June 19, 2013

Front Deck Tour

**Welcome to the Front Deck! You'll find corresponding project links under each photo. Enjoy!**

Whoah... it's mid to late June? Stop it. I feel like I've been going CRAZY with projects lately... I don't know if it's the weather or the coffee I switched to, either way I love it.  I think I'd mentioned before how we were fixing up our front deck, remember the bird feeders? Well I think we're done-ish! I took a breather to get some photos to share, and heads up - most things you see on the deck are projects you can do! Of course...heh..

Here's the best angle:
What do you think? It's so bright in contrast with the forest background.  I know I'd said before that I REALLY wanted to do a large fake grass rug here (you know, the new stuff that's fancy) but it was going to be well over $300. And I'm not ready to spend that on fake grass.....yet. So this IKEA $30 outdoor rug was a much better deal...

I also see making a new fountain in our future (on the left there)... but for now I love the sound.

The deck before was completely empty. It didn't make for very cozy hangouts, but now we're out here all the time. Here's a progress shot actually, from when we first got the patio set:
Oh man those cushions were DRIVING ME CRAZY. So I covered them (with navy blue), since I couldn't find any new ones that I liked.  See how empty the pots are? This was right after I built a few of them, hint hint.... tutorial soon... They were pretty easy.

Here's the view when you first come up the stairs to the deck, from the driveway:
And a lovely close up of the cluster of miscellaneous pots and planters that help close in the back of the patio arrangement:


Isn't that tall plant awesome? It's an "Indian Rhubarb" but isn't edible.  It's also called an umbrella plant, I love it. I had wanted it to be somewhere in the yard to get really large & in charge, but Debby the Destroyer (Our deer visitor) decided she loved it as well.

I scored that orange candle holder at the goodwill - 50 cents! It used to be black. I fixed that...

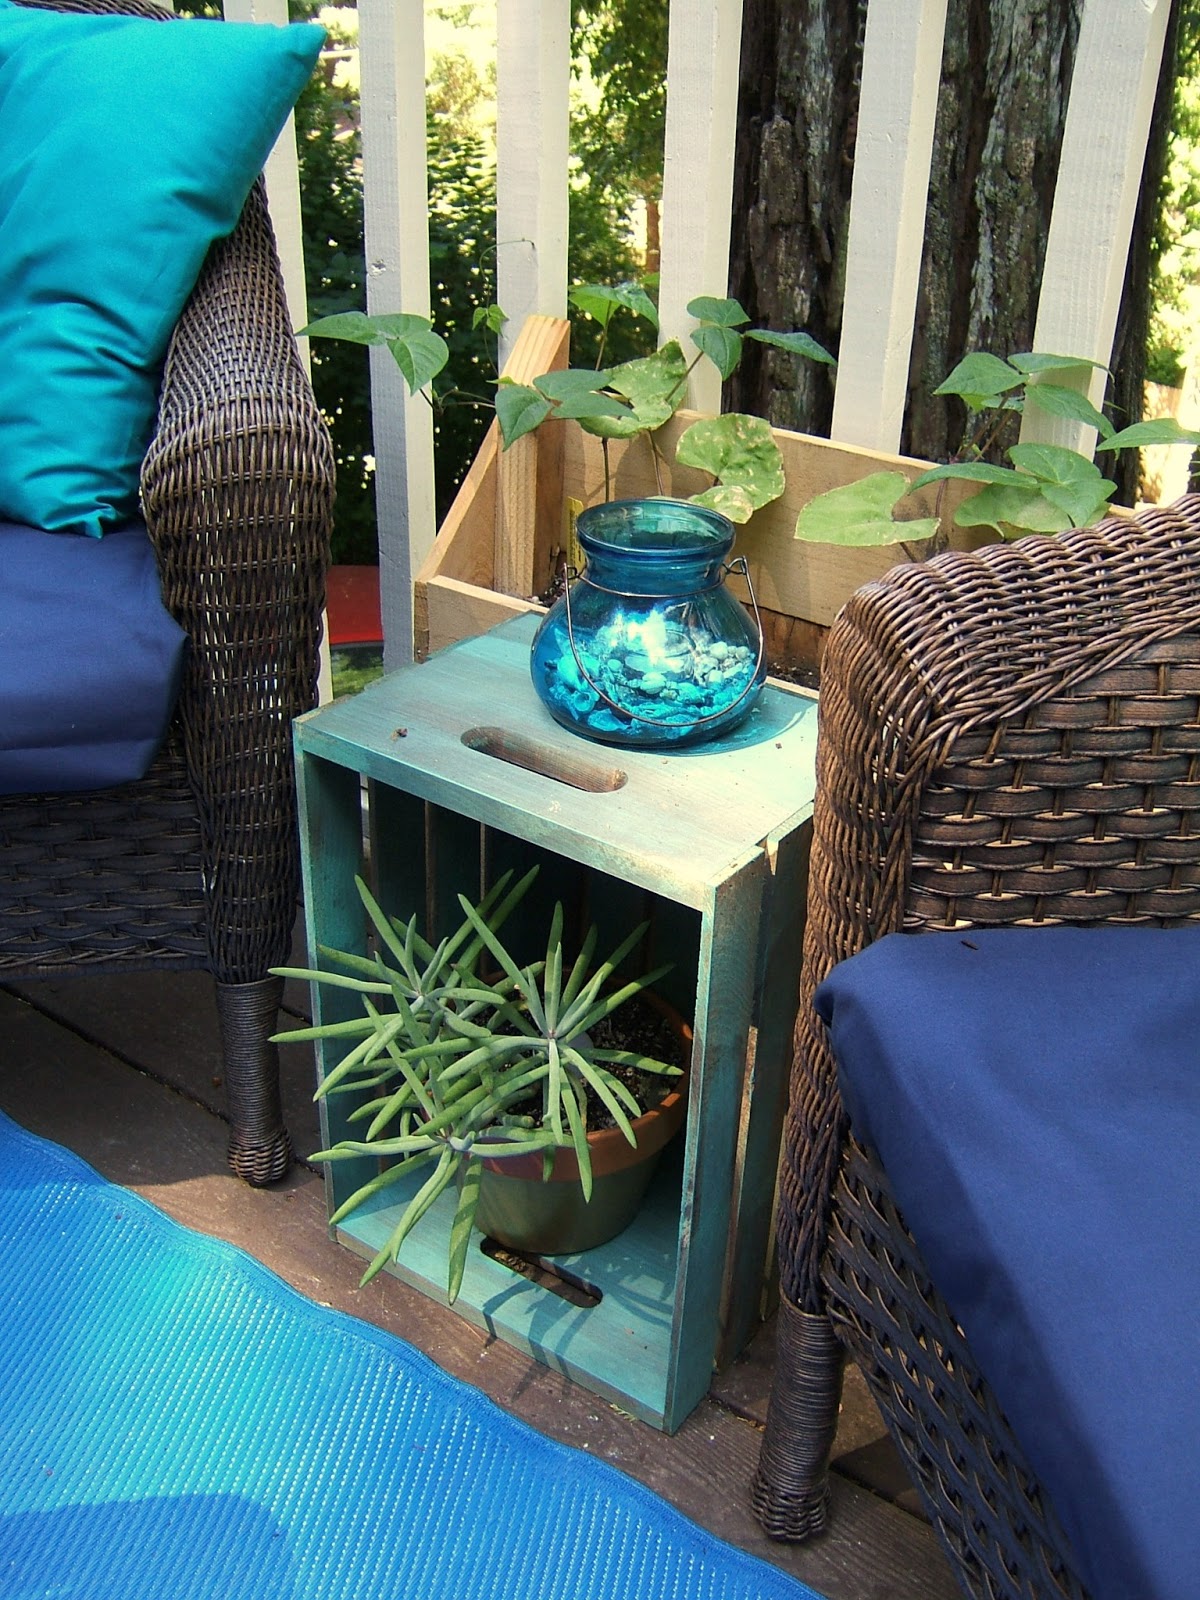
Here's what I decided to use for little tables. I had been hunting the thrift shops for something I could fix up, but nothing worked. Then at the craft shop one day I saw these crates on sale for $6 each.
They WERE bright and new when I got them, and I knew just the treatment.  Remember the Antique Colorful Crates I posted about a bit ago? Yep. Now I have some too.

The candle holder in the photo above was also a goodwill score. They were missing their glass, and completely covered in gross wax.  Which is probably why no one took them home. They looked about the right size for some IKEA vases I already had, and I figured if they weren't the right size that finding a clear glass vase to fit couldn't be THAT hard, right? Well good thing I grabbed them. After freezing the wax off it was revealed that I had just paid $2 for a set of Pottery Barn lanterns.  Sweet!

Upcycling thrift store salad bowls into succulent planters.  Don't those tiles look like Cheez-its? Mmm...

Here's the view if you're standing on the blue rug, facing the front door (or what has become the front door). Yes I know, we need a new light fixture, but that's what that one on the floor is. Waiting to go up....wanna do it for me? 
That rocker came from the goodwill too, it used to be scary looking.  We nicknamed it the Candy Corn Sunrise chair... haha, ridiculous.  I wanted an Ombre fade and when I was done we realized it kind of looked like Candy Corn. Still cool, but definitely candy corn.  I totally ran out of orange paint and had to finish with yellow at the bottom. Ooops... maybe I'll fix it. Maybe I won't.


This table used to be brass colored. I had a hard time changing it, because I DO love brass, but it just wasn't right out here. I loooove the navy! Now I just need the plants to get a move on and make this area look more full & lush. Yes, that's a colander.  Eventually a colander FULL of chives. (grow little babies, grow!)

Pottery Barn candle score #2 and a few upcycled planters...
 Strawberries on the way!  Forgive the blurriness...
We grabbed these lanterns from IKEA, they are such a good deal at $3.99, and used extremely strong outdoor double sided tape to secure them to the banister:
I think they ended up giving the patio a Moroccan feel, which was a total accident.  These combined with the bright complementary colors and oops - we had a Moroccan style patio. I'll have to run with that in mind as I fine tune the details here and there. Toss in a little gold, you know the drill.

Oh, then these of course:

You can see more tutorials & tour links in my House Tour section.

So that's our patio! What outdoor projects have you been up to? I'd love to see them.  The warm weather makes me want to be outdoors 24/7. I'm writing this from outside right now... plus this is our first year "in the mountains" which is really only 15 minutes outside of Santa Cruz.  But wow, the weather is amazingly different. I was used to the fog rolling in at a moments notice, and hooded sweatshirts in July...not here. This is so different! 

Have a wonderful Wednesday everybody, thanks for tourin' with me.

-Jesse

Psst... do you like the new look of the site? Hope so!

Linkies: FacebookPinterestInstagramTwitterSubscribe & of course, Email me.


Post a Comment

Monday, May 20, 2013

Spotlight: Fan of Succulents

Get it? A Fan of Succulents? Because these are old fan covers! Now you see it, huh?  My sister Denise sent me this super cute planter the other morning and I fell in love! Pinned that right away. What a perfect succulent planter!  And surprisingly - I have actually brainstormed in the past uses for old fan covers, who knew I'd have enough dead fans to actually think this over?  I'd seen people make them into snazzy fruit bowls before, but really - you only need maybe one of those.  These? You could go on and on with this project and have them all over the place.

For the full project tutorial, pop over to Rancho Reubidoux.

I think you could do this with newer fan covers as well, as long as they are metal. Just pop any plastic parts out, and either give it a fresh coat of spray paint or distress it and let the weather do the work.  The metal will age well regardless and look really killer with the succulents. I wonder if you slightly sanded a the paint off the metal, then left the cover in a tub of water for a few days, what would happen? Anyone done this?

What do you think of this idea, you like? I love it. Next time I see a fan at a garage sale, that puppy is coming home!

Thanks Denise for sending the idea!
Got an idea to share? Submit it here.

Entered the String Art Giveaway? It ends Thursday! Click here for details.

     -Jesse


Linkies: FacebookPinterestInstagramTwitterSubscribe & of course, Email me.

Post a Comment

Wednesday, May 8, 2013

How To: Flower Tower

Mother's Day is right around the corner! This weekend folks.  In our family, it became a tradition to get our Mom beautiful plants for her patio.  Each year my sister and I attend the Cabrillo College Plant Sale the day before Mothers Day, and pick out a ton of great plants for Mom. It's great- the College's horticulture program sells all the plants they've propagated all year to the public, in one massive Mothers Day fundraiser.  We have always found the most unique plants!

When I saw this tutorial on the Home Depot website (actually it was a commercial and I quickly scoured the internet for instructions. Hard to find!) I instantly thought we should try it one of these years.  If you are looking for a great Mother's Day gift, think about this:

Tah-dah! Wouldn't that be great?  It's not terribly challenging either, looks like they are using a simple wire cylinder frame lined in landscape fabric.  Simple yet sophisticated, consider making two to frame an entry.

Hop over to Home Depot's Garden Club for the full instructions. (Disclosure: This post was NOT sponsored by Home Depot, I just love this idea!)

What are your plans for Mothers Day? Do you make or buy your gifts for Mom?

Love hearing from you,
     -Jesse

**Here was last years post for a great Mothers Day Vase idea.. check it out.


Post a Comment

Monday, May 6, 2013

Spotlight: Straw Bale Gardens

I was way bored the other day and started browsin' around the internet... you know how it goes.  I came across this little gem of an article about making raised beds with straw bales.  My first reaction was NO WAY a million weeds will grow from the seeds! Right? Wrong.. I guess straw bales are different than hay bales, in that straw bales are the leftover stalk once the seed has been harvested.  And hay is full of grass& weed seeds.  Ahh.. I'm obviously no farmer.  See what you think:
 Source
That tomato looks delicious...What I love about this is how EASY it is.  The look is a little rougher than I'm used to seeing in raised beds, but I dunno - it looks kinda cool? Especially with the black bark around it.   Joel, of StrawBaleGardens.com explains that's it's pretty much lay it on it's side, plant your plants, keep it watered and enjoy your bounty.  The warmth of the decaying straw is great for the plants, as well as the nutrients it provides.  When the seasons over, it just turns into soil.  This would be perfect for those areas with poor soil or hard to dig.

Hop over to Joel's website Straw Bale Gardens  for more info, directions and a few videos.  What do you think of this idea?

     -Jesse


Post a Comment

Friday, April 26, 2013

DIY Concrete Firebowl

I've been majorly in the spirit of all things patio lately, after fixing up our front porch, to brainstorming space saving planters for our deck, I can't stop planning ahead for warm summer nights out there.  I saw these amazing do it yourself concrete fire bowls recently from the blog B3HD,  check them out:
Lookin' good fire-bowl....and YEA...  This IS a do it yourself project!  Ever worked with concrete? You're about to - this weekend you should get outside and make yourself a whole set.  Heck, make everyone a set. You just need some concrete, some bowls, and some time.  See the full tutorial on the awesome blog B3HD, and if you do this facebook me your photos! I get totally inspired to get to work when I see what y'all are up to..   This same process would make killer planters, don't you think?

Have a glorious weekend!
     -Jesse

Up Next: Meet Otis the Owl, my latest string art design. 

Keepin' connected: Facebook, Pinterest, Instagram, Twitter, Subscribe & of course, Email me.

Post a Comment

Related Posts Plugin for WordPress, Blogger...

Shareaholic