Google+ Nine Red: Kitchen
Showing posts with label Kitchen. Show all posts

Monday, May 12, 2014

New Kitchen Buffet with Open Shelves

Well in the midst of the usual balancing of many projects, we squeezed this one in recently.  I  had really been craving some large scale open shelving in our kitchen, because with it's height - I felt something BIG was in order.  
If you've been reading around here for a while you've seen the original Kitchen Hutch we had (If you're new, click here for the Kitchen Hutch History):

 I LOVED it, but when I stood back I just felt like it was small for the room (I might be crazy though...) and a little more country than we were goin' for.  Still, don't get me wrong, I LOVE the hutch and replacing it was a tough choice:
As luck would have it, our friend Kim was soon to be moving into a house & needed furniture, and said she loved it too. Perfect! So knowing that she loved the distressed style, we added a little more character here & there for her:
Just a little sanding sponge action & a Saturday night, you know how it be:
The next task was finding a replacement.  In my mind I saw a buffet vs. a hutch, with wide open shelves above it, sprinkled with vintage goods, my ever-growing dish collection, & plants.  On my very first attempt at finding such a thing, I found the perfect fit:
It was in GREAT shape, solid wood, dovetail joints... I think it's pretty old. It was $70, which is normally a little rich for my blood (for USED furniture), but I had to stand back and look at the bigger picture - knowing something  new would not only be thrice the price, but particle board for sure. Which we all know how long that lasts. . . . But this color wasn't me, and in an effort to tie both sides of the kitchen together, we used the same blue/grey color from our lower kitchen cabinets.  (See THAT post here)
This was such a fast job! One afternoon.  We removed the top because we intend to redo it separately once we decide the stain color.
I was using my favorite spray gun that connects to the air compressor (many have asked, you can find it here) filled with my paint. I prefer paint & primer in one, it has great coverage & less coats. Mix a little floetrol in there, and spray away.
I skipped the clear coat on this one to let it age naturally, and the paint was already semi-gloss so it looked finished.  Win-win.

Let's bring it in:

These will be night shots, sorry! When I get going I wait for no one, not even the Sun.   I picked up these brackets from IKEA. They are solid wood, inexpensive, and cute!  These are the 11" size, and using a 1"x12"x6' board for each shelf. 
One snag, I hit the beam on the left side, but the right was pure drywall. I NEEDED these brackets to be strong & lined up nicely above the buffet for aesthetics, so heavy duty drywall anchors saved the day.
I always get a little scared with wall shelves, so before loading these up I put a few books all over them for the night. The next day everything was still tight & secure, and I knew accessorizing could begin! I gave the shelves a quick whitewash & seal (minwax poly baby), and over the next few days we arrived at this:

I'd been slowly collecting things from thrift shops & beyond for this project.  I wanted the shelves to be useful & cute but not over-packed.  One of the main things I was going to miss from the hutch believe it or not, was the fabric background.  I just love that print. So I quickly covered a canvas in some remnants I had, as a tribute to the last hutch.

Coke bottle spice racks...

Progress! Those doors  had to stay open for a bit after painting the interior, but they are back to normal now.  You can see a black curtain on the left side there... yea... that's part of the "tear out the kitchen rock fireplace" project.   More on that later...
I love it! I installed a simple set of under cabinet lights, using the gap behind the shelves (caused by the brackets) to hide the wires.   Oh, those wine glass racks if you're wondering, are from Amazon.
Owl Salt & Pepper shakers. I'm just playing with my camera here.. bear with me, it's new :)


Done. I'm really happy with the outcome, I think the collection is fun & casual. The shelves are open & airy. The size of this set-up really ties the kitchen together, and gives us a lot more flexibility.  Small steps towards the bigger dream kitchen that is probably years & years away.

With the nice weather, we've been working a lot on the back patio lately... can't wait to show more of that.

Have a great week!

-Jesse


Linkies: FacebookPinterestInstagramTwitterSubscribe & of course, Email me.

Post a Comment

Wednesday, March 5, 2014

China Cabinet Makeover

Hello again! Ralphy & I have finally gotten back into painting furniture! Feels so good. While moving here was a wonderful thing, I did lose my workshop, meaning we can only paint when the weather allows. Which luckily in California, is fairly often. I've got my eye on under the house to be a future workshop, but that will take a lot of time, and probably a lot of money. So for now, we work out in the sun under the glorious redwood trees. I guess it could be worse. . .

So in our kitchen, one thing was missing. A refrigerator! Of course we have one, but the only place for it was just outside the kitchen, in the entryway, facing the living room. And when the door was open, no one was coming in or out of that room. It bugged me:
So once we had a spot across the room for it (pics soon, it's terribly ugly right now!) it was time to fill the old spot with something special. And after scouring craigslist for a bit, we found this solid wood beauty for a mere $140..
It was the perfect size!  It's more than I would usually pay for something we were going to give a makeover, but the fact that it was immediately available & the perfect size shows it was meant to be, and I forked over the cash.
I think it was painted in oil paint, the black was really pretty & very soft to the touch. Actually, the couple we bought from said it had been red, green, you name it.  But we were craving color. Strong color. Perhaps it's living in a light challenged home, or perhaps it's us craving summertime, we both knew what color we wanted. Cozumel.  No doubt....
After Ralph gave her a serious dusting, it was time to tape up the glass. Normally I'd just remove the glass, but this thing looks to be about 80 years old, and the glass was held in with teeny tiny tacks & pieces of wood that I KNEW would splinter, break, shatter, etc as soon as I took them off. So yea, taping sucks, but re-installing 80 year old glass sucks worse.  Pick your battles.
Oh look, a drawer.
PAINT DETAILS! Ok, many people have questions about the color, brand, etc of paint we'll use on a certain project, so here it is:

  • Behr Paint & Primer in one, Interior, flat finish.
  • Color: Cozumel. They don't always have a card for this color, but just go up to the counter and ask for Behr's Cozumel. They have it, and we love it.  

Halfway through painting I realized I forgot a mask.  Don't do that unless you want to sneeze cozumel, too.

We chose to not sand.  We had the primer in the paint which sticks to most surfaces REALLY  well, and we had planned to let this naturally age and show the black through.  So laziness + supposed planning ahead = long lasting paint job that always looks like you meant it. Yay! 
We are using a lovely HVLP Gravity feed gun connected to our air compressor.  I believe the brand is husky, I got it at home depot. I found the same on on Amazon right here, however. And actually that's a better price, I should of done that. But it's the same one, and I adore it.
Floetrol: Paint on it's own can be a little thick for my little gun, so you have to water it down a bit with Floetrol. I do a ratio of 1 part floetrol, to 4 parts paint. Stir in a separate cup, and dump in.  Floetrol also helps smooth out the bumps, it's kind of magical to watch. I use it sometimes when I brush by hand for the same reason, bye bye brushstrokes. Here's a Link to Floetrol if you've never seen it before.
Reeach! Can you tell I'm vertically challenged?
Lookin good! That took about 30 minutes (I knoooow!) and we let it dry while we went inside for cocktails. Luckily the hardware was already pretty nice, so that saved some cash.  Oh, guess what we forgot!? The SHELVES..... and we realized it after we put the paint away.  Though I'm so glad we did.... look at the black shelves:
I love it! So much better than a refrigerator in our hall/entryway/awkward area.. the black shelves look really nice in my opinion, and when the black coat underneath comes shining through over the years, it will compliment nicely.
View from the kitchen side of things:
 Remember before....
Then of course we had to start playing with what will go inside... the original plan was to cover the back of the glass in a cute fabric, but we fell in love with it as is. So it stays clear.
I'm really happy with how this came out! What do you think, should we have left the fridge? Haha... no.  Do you see that miniature wind chime in the pic above? It's in the lower left corner.  That... is amazingly... for our cats. Yep - we have the indoor/outdoor cats totally trained to ring a little bell when they want to go outside. Spoiled beasts.

Have a good one!

-Jesse

Not ready to quit reading yet? That's what I like about you... ;)


Linkies: FacebookPinterestInstagramTwitterSubscribe & of course, Email me.

Post a Comment

Tuesday, October 8, 2013

Spotlight: Painting a Back Splash

This last weekend we installed rain gutters.  Came out great, there were no ups, no downs, it was pretty straight forward & unexciting.  Therefore I have nothing terribly interesting to share about that, haha.  So I decided to choose a topic that's way more fun. The Kitchen!  As we move right along with the projects in there, I started really considering tiling our back-splash.  However, the long term plan is to pretty much flip the kitchen and blast a hole in this wall behind the stove to open up a bar space to the living room:
DIY Painting Cabinets
See - behind that wall is the living room, and if it were open with a glass floating cabinet... it would really join these rooms together. Often times we totally get stuck hanging out in the kitchen, and I'd love to bridge the gap someday.  So what do you do to get a non-permanent back-splash in the mean time? You paint it!

One of my favorite blogs, Sawdust & Embryos, have shared some amazing painted back-splashes, they are so inspiring.  It's been on my to-do list forever, and once our friends Danielle & Patrick painted theirs I was able to see the results in person. And? I LOVE it. All systems go...

While I have no ideas what colors to go with yet (bright & crazy? Or keep it neutral...?) I can at least start gathering my supplies, and convincing Ralph that this needs to be on top of the to-do list.  To learn how to paint your own back-splash (or anywhere else you want a tile look) head over to Sawdust & Embryos for a fantastic tutorial. Definitely something you can do.

Here's a sneak peak:
How To: Paint your Back Splash
Can you believe that is PAINTED? Looks so awesome..professional & clean. The colors totally speak to our kitchen too, notice that? What a perfect example. I'm leaning towards this same thin, long tile, and I think I'll have to contain my excitement for bright colors and stick to neutrals. Maybe a few teals here and there.. We have plenty of fun accessories to soothe my color cravings... heh.

What do you think, will you try to paint a back-splash in your home? Special thanks to Beth & Nick of Sawdust & Embryos for the great tutorial! Wish us luck...

Oh by the way- anyone nearby want a hutch?

-Jesse

Linkies: FacebookPinterestInstagramTwitterSubscribe & of course, Email me.

Post a Comment

Thursday, September 26, 2013

Painting the Kitchen Cabinets: Part 2

Do you ever have those weeks, where your day job says to you "Yea, this is all you'll be doing this entire week, including evenings"? That's me this week, it's my turn.  I haven't had a spare moment aside from working, eating & sleeping - crazy! But I found time to sneak in a post, since I felt so guilty being postless all week.... Last week I posted Part 1 of Painting the kitchen cabinets, and this week I'm so excited to show the rest:
Aaaaah! Fresh & Clean.... this time we used the sprayer, which is pretty self explanatory, maybe I'll do a post on it someday though.  But as you know, we DID do the white ones by hand, or roller... (full directions in Part 1).  Also - we decided to add a few coats of minwax polycrylic on this set, in semi gloss.  Being the bottom half, they'll be more likely to get beat up so.. better safe than chipped, right?

Before I show the close-ups, the color is Glidden's Blue-Grey Slate.  Paint & Primer in one (a must!), in Interior Semi-Gloss. Here is a link to the color.  Always tell your paint person what you need the paint for, as they will have the best advice for your finish.

Like I said, I'm sneaking in this post before work, so let's get to the good stuff:
It's an interesting color! I love it - sometimes it has a blue tint, other times  a dark grey... and at sunset it gives off a blue purple.  Hooray... color changing cabinets!
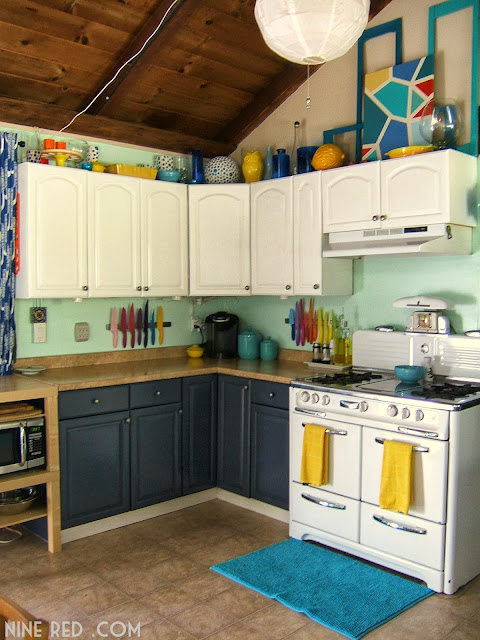
Things are starting to come together. Yes, those are rainbow knives! Ha I know.. typical of me, right?  Many of you asked about them - they are called Pure Komachi, and they're the best knives I've ever used, so sharp.... (find them here on amazon - they have tons more too).  Rather than use a knife block, we used IKEA magnetic knife strips to keep the counterspace pretty free.
This area is to the right of that stove, across an entryway.  I love that blue-grey slate!
Hello new rug! (Ikea.... lovely!)
Oops! Bad photographer moment... Surprise appearance by Sir Brown Paper Bag, who in our part of the country, is becoming a rarity...
Oh, I grouted that round marble lamp in the top corner there, I'll be sharing that soon - came out great.
There we go! I love this angle.. really shows off that stove.  What do you think of our newish cabinets? Eventually the counter-tops will be hopefully butcher block, but cement would be amazing too.  We'll see how the wallet feels when the time comes.  All in all, painting the cabinets was the affordable upgrade we needed, to hold us over until we redesign the kitchen all together.  But honestly? They came out so good I wouldn't mind them sticking around...

What about you, any cabinet transformations in your future?

Back to work... wish me luck...   ;)

Have a fantastic weekend!
     -Jesse

Related Posts in-case you missed it:

And one last time, here's the paint color link, Glidden's Blue Grey Slate:
Linkies: FacebookPinterestInstagramTwitterSubscribe & of course, Email me.

Post a Comment

Related Posts Plugin for WordPress, Blogger...

Shareaholic