Google+ Nine Red: Custom Order
Showing posts with label Custom Order. Show all posts

Wednesday, June 5, 2013

Gold Table For Airbnb


Well there she is.  Lately I've been working on a no-longer-secret project, this gold tiled table.  I was approached by the people of makeably, who had a client, who had their own client, that needed a Gold tiled table.  Top, Sides, legs... all of it - gold. They asked if it could be done, and the collaborating began.  So yesterday when makeably.com did their article on it, I was surprised to see that the table was actually for the offices of airbnb.com!  You can read more about it on Makeably.com, or click here.  But the jist of it is that airbnb wanted to celebrate their success by decorating their new office in the themes of some of their popular apartment rentals. This table, was apparently in someones apartment in Berlin. Neat! Some close ups:

This was not the easiest table in the world, but it also wasn't the hardest. I learned a lot, had a lot of fun, and was really happy how it all came together.  Finding gold tile was the hardest thing in the world, every company I talked to said "no one ever asks for gold, so we stopped carrying it years ago".  Special thanks to Opus Mosaics for really pulling through for me here! 

The company I was working with also asked if I could tile up a table they would send me, which is this:
 Yes, it's missing it's legs! Haha. They will be attaching those later on.

Special thanks to Jessica over at Modwalls, she really helped me out! See, in order to get a custom blend of colors, you usually need to order at least 20 sq. feet.  Well, I clearly only needed about... two square feet? So she lent me the tray, and I hand placed the color tiles one by one.  It's a multi-step process but worked out well. Check out Modwalls when you can, they are a local company (Aptos!) but ship all over the place.  The custom tile blender is awesome!

So that's done.  Dropped them off yesterday and swung by IKEA on the way home.. it was a Tuesday so it was EMPTY. Best time to go EVER.

Thanks for checking in, have a good one!

-Jesse

Linkies: FacebookPinterestInstagramTwitterSubscribe & of course, Email me.

Post a Comment

Monday, April 29, 2013

String Art: Otis the Owl

***Update: Otis the Owl Complete Pattern download is now available in my etsy shop, as well as complete kits that come with everything you need: Pattern, board, nails, string... you name it. Check it out here***

Hey, hey! So his name doesn't have to be Otis, I'm just a sucker for the whole alliteration thing... I'm excited to show you my newest string art design - this was a project for the winner of the String Art Giveaway I did on Better After a while ago.  The winner and I discussed all types of ideas, she showed me a board on Pinterest she had created that focused on many styles she loved.  She really wanted an Owl.  So I took inspiration from her ideas, and combined them into this:


I love how it came out! It was so challenging to figure out all the details (especially on the feathered chest) but it all worked out great - I'm happy, the recipient is happy, Otis is happy, we are all happy.  It's bigger than usual too, about 11.5" wide by 23.5" tall, and for a new trick I mixed some paint action in there. The wood was hand distressed using the Aged Wood trick from a while back. This one takes longer than usual, but so worth it.  Hope you like it!

I'm going to throw this design into the etsy shop, which you can access by clicking here or the My Etsy Shop tab above.

If you want to make it yourself, I have downloadable patterns & directions here, and complete kits here

Let's make it a good week ahead! 
     -Jesse 

Want to see other string art designs? Clicky Clicky....

Up next on the blog: DIY Floor Mirror - huge wood frame!


Post a Comment

Monday, March 18, 2013

Custom Dining Set Update

Hey, It's Monday! Did you end up making that corned beef? We did, and oh-man - it was delicious.  It was totally worth the amount of salt it came with, haha...seriously a years worth in that puppy.  The new cabbage experiment? Totally gonna remember that, it was great.  But anyway...

A long time ago, a little over a year - I started in on a mega dining project that a customer requested.  It was a really fun project and I was excited and flattered that she asked me to do it for her.  We were in communication the whole time, from picking the fabric to scouring craigslist, and it came out great.

Well, I've sold a lot of furniture over the years and it's always SO great to see the furniture in it's new home. Leila was nice enough to send me a picture of the dining set I did for her, staged nicely in her beautiful home:

Aaaw! So great to see the set in it's home.  Special thanks to Leila for sending these pictures my way, and good luck to her too - she's following her dream and starting a new adventure in a new state, have fun Leila!

Alright before I head out, let me leave you with a gallery of links that'll catch you up to speed if you're new around here.  Thanks for stoppin' by!
     -Jesse

Next up: DIY Picnic Blanket? Yes please...


Let's keep in touch: Facebook, Pinterest, Instagram, Twitter, Subscribe & of course, Email me.

Post a Comment

Friday, January 27, 2012

The Dining Set, part 4

and the finale! Well, I put all the pieces in the same room today for a final photo shoot before they go to their new home on Tuesday.  It's been a long journey, but a fun one, and I really like how they came out. Here's the set:
 I wanted to take a picture from both sides, but my three million windows really drowned that last one out! Up next is a close up of the leg, chairs, and table top.
 So, you might notice that table top is a bit different than the first picture I had showed you in part 3.  Well, it is and I'm glad! The person I'm doing this for agreed, it needed a little more brown and warmth, so I distressed it and rubbed 2 coats of Jacobean all over it. Came out great! I love it. I'm waiting for it to fully dry before giving it a good seal to withstand the wear and tear of real life. Isn't that ironic, we distress furniture and then seal them so they won't become distressed? One really great thing about the distressed look though is that if it DOES get a scratch, it's pretty forgiving. I'm rambling, here's some shots of the table progress if you are interested:
 That's the first coat of Jacobean, below is also:
 Bring in a lil' leg to show some contrast:
 And the final coat:
I love that the table is expandable, but with this many seats (6) I think it will always be in it's widest form.  This was a really fun custom job, I was so happy to do it, and I hope she loves it when we deliver it on Tuesday!  Have a wonderful weekend everyone!


Post a Comment

Tuesday, January 24, 2012

Dining Set, part 3

I'm just about done with the dining set! You've seen and read the progress so far, here, so let's cut the chatter and get down to business. Here's some final shots of the chairs and progress of the table.  First up, the chairs!


 I love that fabric! It's textured so it adds a lot of interest and changes the look in different lighting.
 Don't mind the bits of upholstery foam all over the house.... haha. I had just finished up!
 and in the shop, the table during it's sanding when I remember I had no photo yet:
 
There it is with the final stain coat on it. She chose "tugboat" by behr, which is a semi translucent stain/coating.  It still lets some of the wood show through while effectively delivering the color she wanted. We are thinking about distressing the edges to let the light wood show through just a teeeny bit. Not sure yet.  Once it's done drying completely I'll set the whole thing up for a fun photo shoot. Have a great Tuesday!

Post a Comment

Thursday, January 12, 2012

Dining Set, part 2

Moving right along, the chairs needed a good cleaning and a priming.  Here they are:
 What a difference some primer can make!  Yes, maybe I'm over excited about it.  But to see some progress here was really helpful, haha.
 Since the style she wants is a distressed style, I wanted to do a nutmeg undercoat.  In this case I used spray paint.  I just love spray paint.
 So that's the final coat! She picked out the grey, and I distressed down to the nutmeg, and then coated the entire chair frame in an ebony stain. 
 Here's a close up of the distress, I love how it came out.
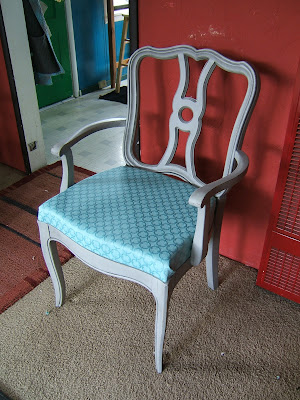
So now you're up to speed, I'll take more pictures as the progress moves along. There are 6 chairs, and the fabric that she chose for them is a really pretty almost teal blue...... you're gonna love it. Have a great day!


Post a Comment

Wednesday, January 11, 2012

Dining Set

In mid December, I had someone contact me about doing a custom dining set for them.  I was really excited about this - one, it was my first time doing an entire SET rather than bits and pieces.. and two, I was flattered someone wanted ME to do it.  We've amazingly been doing the whole process via phone & email, which is pretty impressive.  Between craiglist purchases and delivery coordination, to sharing paint codes so I could get the exact colors - it's been a fun adventure.  I'm almost done, and I thought now that I have a good line up of pictures, it would be a good time to start the sharing.  So over the next few days, I'll show the journey that has been, the dining set. Let's catch you up to speed, here are the chairs as they arrived:
 Oh my....
 Someone, somewhere, loved that print - and got a LOT of use out of them. These chairs were really.... something.  I was so curious to see what was causing the interesting  lumpy-saggy front thing they had going on. 
First things first, I took the seats off. I was SO happy and relieved to see that the base was wood, and not some crazy spring contraption that would have tripled the time on these.  But look at all these layers I found! At least 6, and whoever covered them (over and over again......) just wasn't really feeling the whole, remove some layers FIRST idea.  Notice the clever use of old comforters as a padding between layers, No wonder they had such a lumpy shape before! I found a brown and cream label that said "Davis Cabinet Company - makers of fine furniture - Nashville, Tennessee"  I'm going to say at least 1960's.
 
 Why hello there!  These chairs just aged themselves.. this is the original padding on the wood.  Mesh, straw, and pure unfiltered cotton. You can see all the little husks in it! But, this is a new day and age and we have super-cushy synthetic padding now, so these got a good salute - then the boot. Haha, how cheesy...

Here they are, all six, lined up and cleaned up, ready to be worked on. Keep an eye out tomorrow when I show you what happened next.

Post a Comment

Related Posts Plugin for WordPress, Blogger...

Shareaholic