Google+ Nine Red: Curb Appeal
Showing posts with label Curb Appeal. Show all posts

Tuesday, November 5, 2013

Warming up the Nest

Alright, last week was wild! We've had a ton of work going on around the house, getting ready for the inevitable winter. So we sprang for it, hiring a few people to do a few jobs we admitted we couldn't do ourselves. Gotta know when to call it, right? Mainly the retaining wall & a forced air heater.

The retaining wall in our driveway has been on the ever-growing to-do list since day 1, but as we began to dig at it... we realized it was a job for a professional. This puppy was going to be about 5 feet tall, and hold up a huge hill... not something you want to mess up!  So we sprang for it, and this guy is doing an amazing job in 1/100th of the time we could have done a so-so job.
This is at the top of our driveway, which is already up a steep hill.  They're only half done, and still need to add the stairs so we can get in this side of the house. But wow...
It's been fun to watch (and learn) as they dig & build this wall, and I'm happy we chose a pro. That's a huge hill! I feel confident we could do much, much smaller ones around the yard.. mainly for creating level areas for planting.  I can't decide if we'll paint this wall white like we did with our other retaining walls... (from this post).

While all this digging & building was going on, we also had our heater installed. We have not had a normal, forced air heater in.... 10 years? 12 years? It's always been wall heaters, and let me tell you - this is amazing! It feels SO GOOD to not be typing to you right now with gloves on. Ha! My favorite, favorite part about the system.. is the Nest thermostat.  I knoooow, expensive thermostat, but you know what? They were going to charge us $150 for a traditional thermostat that are SO confusing to use.  The Nest? Easiest thing ever... and was only a little more.  Disclaimer, I am NOT being paid or compensated to talk about the Nest, I'm just seriously thrilled with this thing... 
It's sleek, it's easy to use (turn the dial!) and it programs ITSELF. Yep... using algorithms and motion sensors, it figures out when you are & aren't home, what temperatures you tend to set it to & when, and eventually just starts doing it all by itself.
Oh... and it's on our WiFi network.  My nerd side was thrilled when we realized we can access this thing from our phones, tablets, laptops... and from anywhere.  Coming home early? Tell the nest to get the house warmed up.  Ah... technology.. ! 

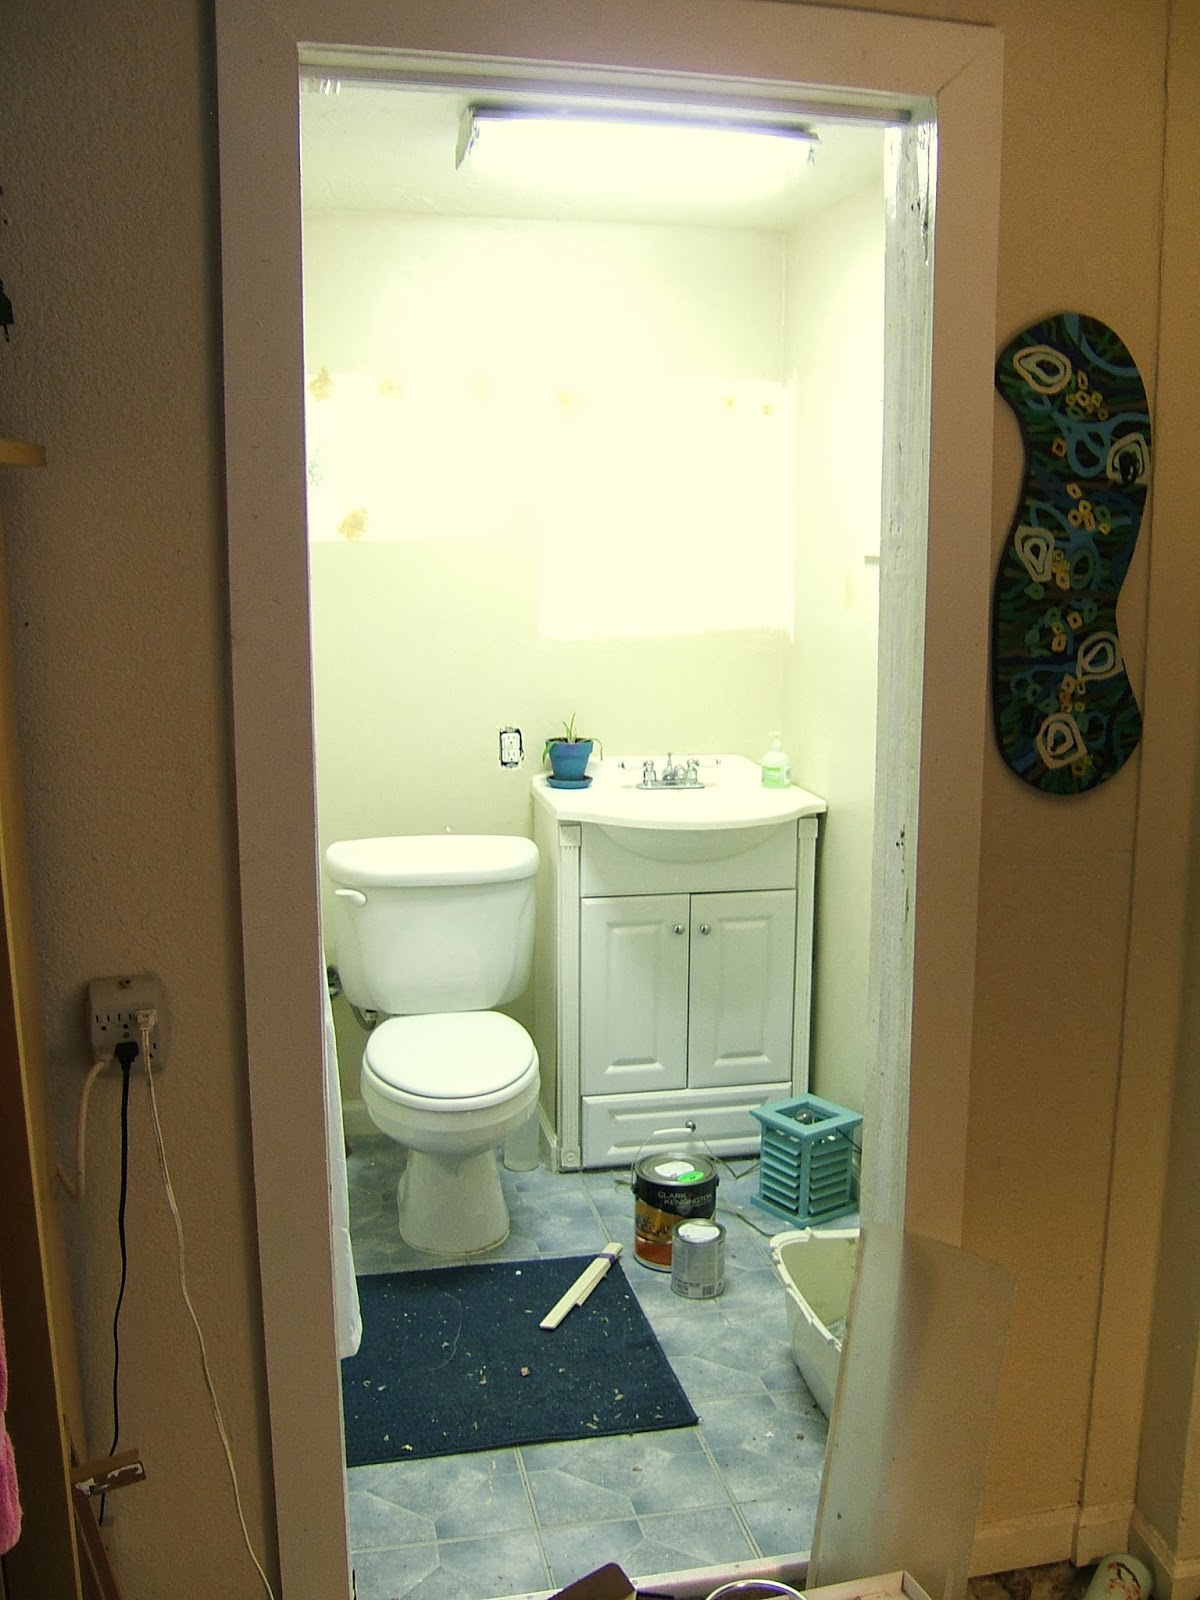
So while all this work was being done, we felt pretty restless and decided to start tackling our really gross downstairs.  I've talked about the issues downstairs before (see this post) - mainly, it acts like a basement, and gets moist & stale, bleh.  Plus, whoever built this place made some pretty interesting decisions. For starters, the bathroom:
I am not proud of this bathroom, and I'm only showing these pictures in hopes that once we are done, we'll have a beautiful AFTER picture.. For now? yikes.  Those squares on the wall were a crooked particle board mirror cabinet, and some ridiculous towel & spice rack combo that held absolutely nothing. Note the gorgeous fluorescent light fixture. You know how I love those.... *barf*
Do you love our dirty peel & stick floor? Do you love that there is no door? Exactly.  Hey, I have nothing against peel & stick floors, they've come a long way, but this one was done wrong, and there are gaps, etc. etc.  The door thing?  There used to be a dirty.. dirty...(don't want to even think why) plastic accordion door here that we should have torn out once we signed the papers on this place. Magically it lasted a year here, because Ralph & I pretty much pretended this part of the house didn't even exist.  But with our stairs missing on the side, we've been entering this room (technically our first floor, and future front door) so it's been brought back into the mix.

With that, I'm going to wrap this up so I can get down there and tape. This is a before & after work type project, so every minute counts.  We're heading down the dark grey, light grey, whites & woods road with this one. Keepin' it clean but still a little dramatic, and a pop of yellow! We want to give it a new look, for a low price, without having to change anything major (plumbing fixtures are stayin' put for now!). Check out my Pinterest board if you want to browse the inspiration, here's a snapshot:

To Do List:
We have a lot of work to do, but it's cold out so we're inside anyway.  Nice & toasty inside might I add, finally! What are your upcoming fall & winter projects?

Have a good one, 

-Jesse


Linkies: FacebookPinterestInstagramTwitterSubscribe & of course, Email me.

Post a Comment

Tuesday, October 22, 2013

Rain Chain Round Up

Remember our crazy floods last year? Yea, the rains can get pretty heavy here.  And most the house didn't have rain gutters, so we've been adding some ourselves. And, we finished! But... just the gutters. Now we have to do the downspouts, and I've always wanted a rain chain. The problem though, is which one? Do we buy one or make one? Well due to the shape of our roof, it looks like in total we'll need about 5 downspouts anyway...  so we'll get to have an assortment.  I figured it's a great time for anyone considering a rain chain to get the ball rolling too. Rain is right around the corner (hopefully anyway, it's dry out here!). Today, I've rounded up some of my favorite ideas, a here we go!

My initial thoughts go towards DIY projects, just to see how easy or hard they may be, and how the cost compares.  I've seen people use just plain old chains, like this:
Source: This Old House
But I wonder about the weight against the gutter.  Usually the chains are lightweight and hang from the downspout, so for a chain like this we'd have to rig a bracket in there. Still, I bet they rust beautifully! I guess you could use lighter weight chain too....

Here's another DIY chain that uses simple metal rings:
Source: Blue Living Project & Michelle Kaufmann
There's a great video on that site too (click the source link below the photo).  I watched it, and they talk about connecting simple metal ring clasps or shower curtain rings. I instantly thought, "OK - shower curtain rings are like $8 for 12, no way is this affordable!" But alas, an amazon search revealed THESE, a pack of 100 for about $8.  You could easily double up at those prices, to create the same look as above. Plus they have larger 2 inch sizes! Mix & Match, riiiiight?

Then there's this beauty, which I spied forever ago on Design*Sponge... I love it:
Source: Design*Sponge
So colorful & fun! Though, I admit, I DO wonder about how well it will age, but maybe that will make it even cuter. Terra Cotta + that lightweight chain make this rain chain very inexpensive.

Here's one I found on Pinterest, that sadly, as Pins often go, doesn't have a link to the original tutorial, but it looks pretty straight forward:
Source
You can see they probably drilled holes in the bottoms of the buckets, ran the chain through each and most likely attached the buckets handle to the chain with an S-hook.  Pretty cute, and galvanized steel holds up to weather really well. So they'll  be shiny for YEARS...

Then there is also the buying it option. I love copper, I love how it turns green, and this one here is only $55 on Amazon so... one of our five may just get it:
Source: Amazon
Tulips! One thing to keep in mind, no matter which rain chain you choose, is where the water will go once it hits the ground.  A popular solution is to have the chain lead into a decorative pot or bowl, full of pebbles or decorative stones. It adds great sound to your yard, too.  Be sure there is a hole in the bottom of the pot to let the water out.

For added drainage & less erosion, dig a deep hole under the pot and fill it with gravel.  This will act as a French drain, dispersing the water back into the ground.  Or, if you're worried about water near the house, you could run a PVC pipe from the bottom of your pot, slightly underground, to an area far away from your home.

The possibilities are endless, any rain chain adds such a nice detail to your home, without very much effort. Which would you choose?  I'm leaning towards copper tulips & metal rings....

Have a great one!

-Jesse


Post a Comment

Monday, August 26, 2013

Curb Appeal: Part 2

Oops! I forgot to update you all when we finished chopping those ginormous bushes down in front.  So, remember in this post when we first tackled the beasts? Well we were only halfway done, and we finally finished! These things, were enormous.  We bought a chainsaw (yeeeea buddy!! Here's the one we got, it was great) and decided the easiest way to tackle them, was to chop 'em in half and clean up the damage. Check the progress out:


 Here's a wide view, it's so weird to be able to look out the windows and see more than just bushes! It's soooo barren now though! Don't worry - the bushes are still alive, they just got a much needed trim:
So the only drawback is our privacy level dropped, but since we're up high, we still have a lot of privacy inside the house. I just love that you can SEE the house now.  That water utility box... major eyesore. I'm not sure what we are allowed to do with it, so I'm just going to plant a big bush in front. I can't wait to fill up the hill with fun (deer-resistant!) flowering shrubs. 

And through the magic of the internet (Or, because we trimmed in June & I forgot to post) you can see the bushes have returned and the hill is filling up a little bit:
 The bushes are coming back but it's still kinda barren in front. This will be a big project! To keep things pretty, here's what I've got goin so far that the deer haven't eaten:
1. Lantana
2. Begonia (up high, otherwise I think they'd mow it down!)
3. Mexican Sage.

Everything else they eat, or try to eat.  I know, I know, clean that roof! Right? Well, I tried. I got up there, cleaned most of it, then got to the front and realized I was really... really...high up there. Scary! So until we get a mega ladder that will reach up there, let's hope the wind handles it.

What's your take? Is this too out in the open? Do you like homes that are cozy & private or standing proud in sight? 

Let's make it a great week!

-Jesse

Related Posts:

Linkies: FacebookPinterestInstagramTwitterSubscribe & of course, Email me.

Post a Comment

Friday, June 21, 2013

I Can See My House From Here!

Well, it's Summer, and I hope you all have amazing and fun plans for the weekend.  We are going to have a BBQ on Saturday night, but our REALLY exciting plans are to do....yardwork.  Yay! I say that with all the sarcasm I can muster up in the morning, I'm not that excited.  But, I'm pretty cheap, so we're doing it ourselves.  We aren't doing the fun kind though, we're doing the tedious kind.. removing gigantic bushes so our house doesn't look like the one that the kids say a witch lives in. I'm no witch.  Remember when I shared that we painted our front retaining wall white?
It was a huge change for the better that totally drew our attention to how the front looks from the street.  See how you can't really see our  house at all? Yea, we're gonna need to change that...  The problem is that these bushes are like 20 feet tall, but are luckily hollow. It just takes a long time to do it. I won't bore you with the details of how yard work goes, I'm sure we've all been there.. all I can say though is that it IS worth the sweat...

So here's the before...
Going.... Going...
.......gone!
And that's only ONE of the bushes.... that took all day! Ok, we started at like 2:30, but whatever.  It's not just the trimming that's a pain, it's dealing with the branches you trimmed off.  Oh well, I love that you can see the house, and now we can give these bushes a fresh start and keep them medium sized vs. gigantic.  Plus now we get to fill up the front with fun flowering shrubs.. now THAT'S fun.. (no sarcasm there..)

I made a fun gif of it, my first ever.

Well that's just lovely. Eek, kind of hard to look at... sorry bout that!  So anyway, that's the plan for Sunday - reel in the other two bushes.

***Update 8/26/13: Took care of those bushes.  See the details here.***

What are you doing for the first official weekend of Summer?

Have a great one!

-Jesse


Linkies: FacebookPinterestInstagramTwitterSubscribe & of course, Email me.

Post a Comment

Friday, May 24, 2013

Curb Appeal: Wonderful White Paint

In my past, white has been the most under appreciated paint color in my book. We totally fought.  I used to think it was boring, and just avoided it as much as possible.  Maybe that's because I always lived in apartments where I wasn't allowed to paint, so everything was stark white.  I was surrounded by it during a time when I craved color, big time.  Then in our last house, the landlord gave us the all clear to paint whatever we wanted, and I about exploded. Color everywhere, which you can see an example of in this old post.  And you can see even then, with the white trim, that I was just starting to embrace and appreciate white. That was a beach house in Santa Cruz, so wild colors went over real well & matched the 'hood.

Then I started to try white a little more. Now don't get me wrong, I LOVE color (yea, seen the guest room? hehe..) but I've really come to appreciate the difference a little white paint can make.  When we painted the pergola we constructed out front, we bought a gallon of that white, figuring we would use it all over the yard.  In attempts to make the house a bit more welcoming from the street, we decided to tackle this crazy retaining wall along our driveway:

Come on white paint, save the day, please.

Post a Comment

Related Posts Plugin for WordPress, Blogger...

Shareaholic