Gather round friends, this is an afternoon project that anyone with a few basic tools can do. Before we start with my usual step-by-step in pictures, here's a collage that's pin-worthy, for all you Pinterest addicts out there (guilty as charged!):
Let's get this done.
Materials:
- Large Frameless Mirror - call glass shops, thrift stores, craigslist, anything - doesn't need a frame.
- 3 - 1 x 6 x 8 pieces of lumber (for a really rustic look use fence wood, it's 1/3rd the cost too!)
- Steel wool (fine grade)
- Vinegar
- Black Tea
- Mason Jar
- Paint Brush
- Sander & Sanding pads (or just sandpaper)
- 4 Flat L shaped brackets
- Wood Glue
- 1/2 inch screws (Home Depot, #6)
- Mirror hardware (clam shell + screw)
- Picture hanging kit (wire + eye hooks)
- Miter Saw, or any saw to cut wood.
**Plan Ahead Notice! If you are going to do the aged wood process like me, start your steel wool vinegar mix a day early, so you don't have to wait! Scroll down for details**
I'd say, add 6 inches to both your height and width, this way the mirror will attach in the center of the boards. Once you have your outside length, you can measure onto your board and set it up on your miter saw.
I like to clamp mine in place, since it's such a long piece. If you're like me, you don't have the fancy saw table that holds a long board to the saw, I found that 4 remnants stacked made the perfect support:
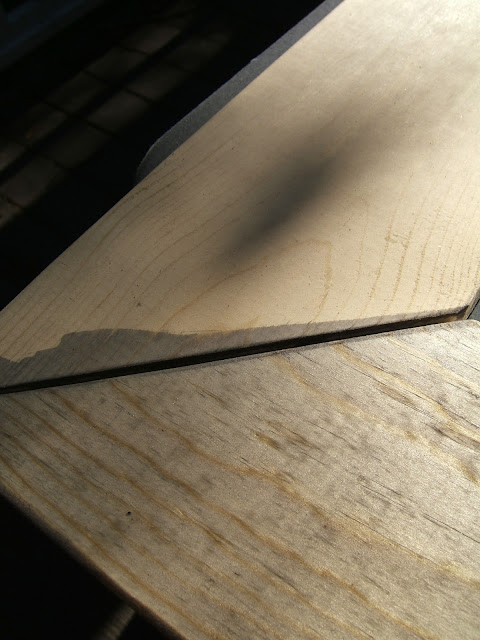
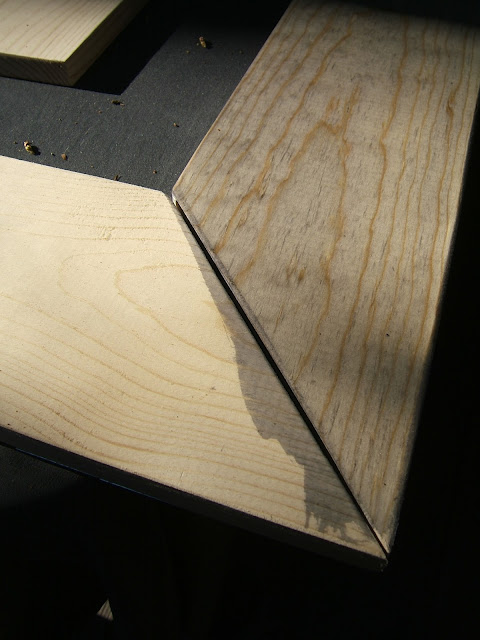
Now cut! Let's start with the two vertical sides. You want to make your cuts inward from the marks you made, which were the frames outside measurement. I chose 45 degree angles, but if you don't have a miter saw, you could easily do this with 90 degree angles. (straight cuts)
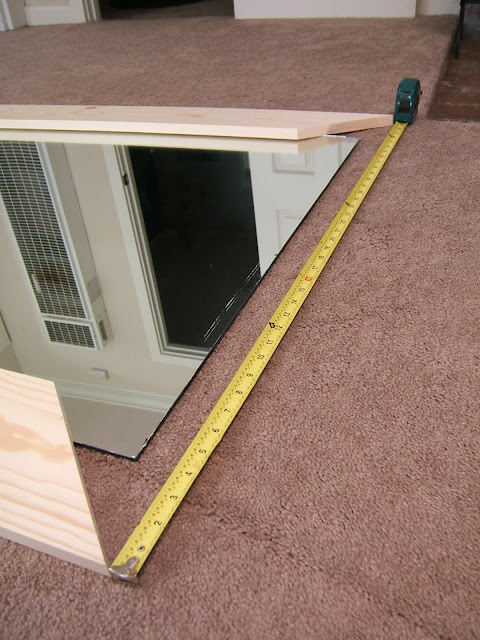
Bring your two sides to your mirror (I chose to lay mine on the carpet because I'm paranoid) and place them where you like them.
This step is kind of just a double check, but it's a good idea. After placing your sides on the mirror, Measure the outside length for the top and bottom, and repeat the last few steps accordingly.
Even if you have a little error in measuring, all the pieces will come together nicely as long as the sides all match in length. The mirror itself will just center behind them. Try on your cuts!
Looks good! Make any adjustments you need to if they don't quite fit correctly. I found a helper:
 | |||
| "My name? ....Is Reuben.... and I'm helping." |
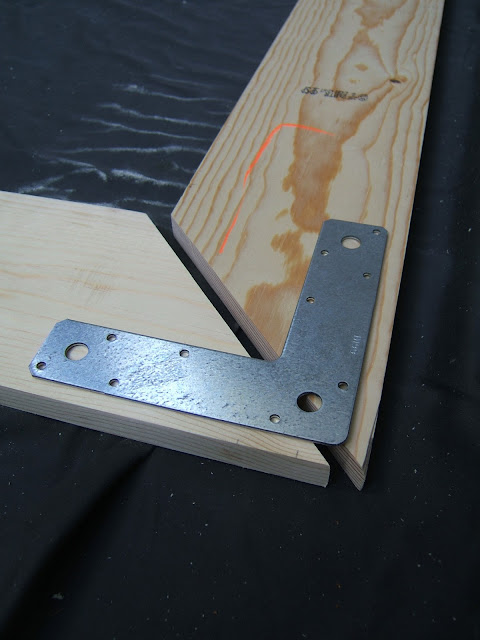
Break out your Flat L's, it's time to bring these pieces together.
As you can see I used a square piece of wood, and clamped from two angles. Totally WORKED. Anyway, time to attach your L's. I'm using a 1/2" screw, looks like it's #6..
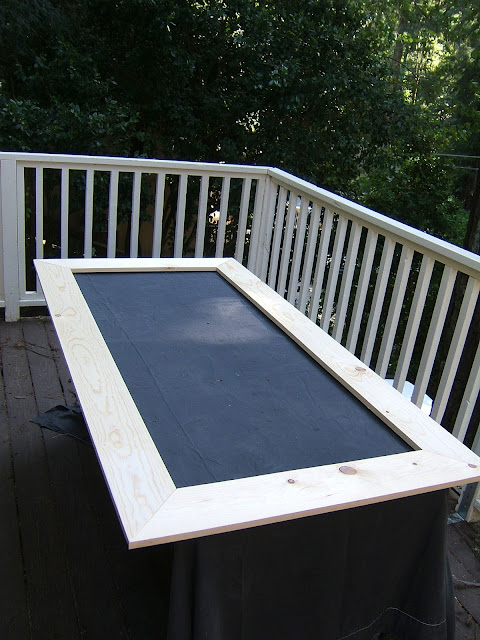
Here's the finished product:
Do that four times, then flip it over - and break out your sander. It's time to smooth the imperfections....See how there can be little cracks and imperfections? Roll with it. This is a distressed floor mirror.... people pay hundreds for that. So just go with it, there aren't any rules. I used my sander to smooth out any rough patches of the wood, and make my corners match up a little better, but not all the way.
Let's stain this beezy! I'm choosing to do the Aged Wood Stain I've talked about before, which, I'll RE talk about since it's been a while. Simplest thing ever. Get your Vinegar, Steel wool, a mason jar, paintbrushes, and a strong STRONG batch of black tea brewin.
We, are going to make your wood, ANY wood, look old. Ancient. Fresh out of barnwood? Aren't we all... fear not - we'll handle that. Drop your steel wool (fine works best) into a jar, cover it with white vinegar, and close it up. Let the magic happen for 24 hours. If you planned ahead then you're better than me, and you don't have to wait at all. Kudos, you.
Plunk! Done. Now brew your tea:
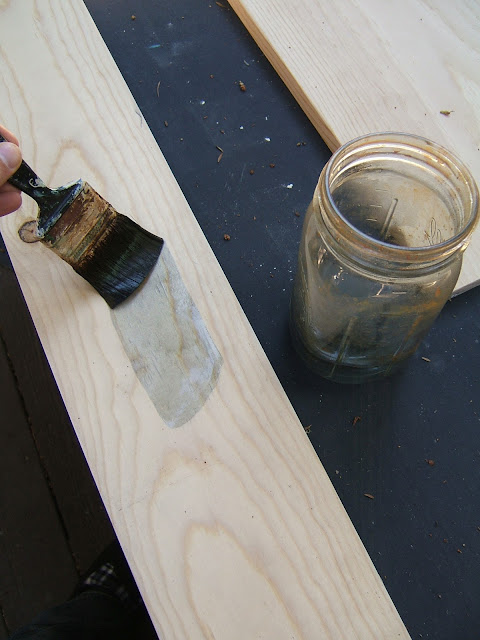
Any tea will do, you're looking for something acidic. I've heard coffee works too. Brush that tea onto your frame, generously. Get every spot!
Ugh, isn't that brush gross? I ONLY use it for this project because the chemical reaction totally ruined it. Keep that in mind! After your tea is dry, it's time to brush on your steel wool & vinegar mix is ready, prepare and be amazed...
Instantly the tea-soaked wood starts to turn colors... check it out:
That's after like 15 minutes! No need to wash it off, just let it do it's thing and as it ages it gets even darker. It's fantastic.
Ugh! I can't get enough of this technique. It friggin kills me. Anyway, enough about that - let's move on.
Lay your frame face down, and carefully bring your mirror to it. Center it face down, of course, and attach the mirror hardware as you would if you were putting it on a wall, only, you're in reverse.
So the mirror hardware is BEHIND, on the BACK of the frame, I'm sure you get it - haha.. Then just install your hanging wire!
I did two eye hooks and a ton of wire. I was too lazy to cut it because my wire cutters were dull (ugh!) so I just used it all, in the name of strength, not laziness. ha!
Ok that's it. Yep. You're done! Stand it up and be proud.
Ok, notice here you can see the CLEAN back of the frame in the mirror... if you don't like that look, be sure to give the back of your frame the same treatment, at least the first inch anyway.
Now setting our mirror up in our guest room........heeeey........
Oops! Didn't make the bed... hehe...oh well, we're all friends here right?
I love it! How'd you do? Was it worth saving $450? Sure it was.. just think of all the things you can do to this too. Paint it, color wash it, chalk paint it up, or give it some stripes. At this price and ease, you can make one for every style you need.
Have fun, and if you make one, send me photos! Either post them on the facebook page or email them to me. Thanks for reading, hope you liked it!
***UDATE: Guest room? Check.. See the full tour here***
-Jesse










looks so amazing Jesse!!!! Fantastic job!!! xoxo
ReplyDelete-Danielle :)
Thankeees!
Deleteso... im not getting how to get the frameless mirror attached to the wood frame. Is it overlapping with the wood so it just rests on the wood in the back? I've looked at a couple of these DIY mirrors and still can't figure that part out!
ReplyDeleteMy mirror is frameless (like a basic bedroom wall mirror) so I want to add a large frame to make it wall floor worthy!)
S-Dawg, hope you get this reply! That's exactly how I attached it to the back. Because I'm a cheater, but it works perfectly, hehe. So, you know how you use those clear clamshell pieces to attach it flat to the WALL? Well you do the same thing, but with the mirror FACE DOWN on the BACK of the frame, and just put that same hardware backwards. Just make sure your screws are short enough that they don't pop out the front. Any more questions feel free to email me 9redinfo @ gmail.com Hope that helped!
DeleteI was googling how to make a full length mirror frame and found your site - thanks for the corner clamping bit, I'd never heard of that and was wondering how I would be able to clamp mitered corners. I've had a cheap full length mirror from COLLEGE (I'm 36) sitting in my garage since I moved in and had been wondering what to do with it. Thanks for the great tutorial!
ReplyDeleteHi! I LOVE THIS! I want to DO this... but flip it 90 degrees and actually hang it on my bathroom wall. Any thoughts on how best to mount it on the wall? At first I was thinking I'd mount the mirror and then try to glue the wood on top - but that sounds like a terrible idea... Thank you!!
ReplyDeleteHi Tania! Yes I have hung one on the wall actually - you can read the post here for details http://ninered.blogspot.com/2014/03/before-after-downstairs-bath-official.html
DeletePretty much I made a wire hanger on the back using heavy duty wire, and then got some drywall anchors that were graded for like 100 pounds, the mirror is still up. But I was definitely skeptical! Ask at your hardware store and they will really hook you up.
Here's a better link actually
http://ninered.blogspot.com/2014/01/downstairs-bath-diy-mantle-mirror.html
Thank you! A lot of detail. And thank you for not having pop-up ads!!!
ReplyDeletethats tea steel wool thing is amazing. im going to try this !
ReplyDeletethats tea steel wool thing is amazing. im going to try this !
ReplyDeleteHey y'all! Just a quick tip - DO NOT use 'cleaning vinegar'. That is labeled "not for consumption" and will not dissolve the steel wool at all! Had to pick up regular / apple cider vinegar to get it done!
ReplyDeleteA framed mirror is pretty cool..great idea to what you have done on what would you like to do with your mirror..great job. Please Visit:
ReplyDeleteCustom Picture Framing Sydney
Hey im a bit confused on how tobapply the mirror hardware.. Can it bebexplained? Please
ReplyDeleteWhere can i find those L brackets in your picture ?
ReplyDeleteThe essayist, through this blog, has earned regard from numerous for all the correct reasons.
ReplyDeleteClick here